|
MSDE 2000 Release A - Setup And Configuration
(c) brokenribgolfer.com
Date Published: 10.15.2005 Date Last Modified: 02.11.2026 (formatting) Information on managing Microsoft SQL Server 2000 Desktop Engine (MSDE 2000) is somewhat hard to find. Here I will cover the basics, from setup to database creation to setting up users and roles.
Background
More than once, and more than twice I have had the need to install the personal version of SQL Server 2000 on my Windows XP Professional workstation. Microsoft calls this version Microsoft SQL Server Desktop Engine 2000, or MSDE 2000 for short. It is one of many "free" offerings from the sofware giant, but it comes basically without suport. Of course, I am sure if you have a credit card handy, Microsoft would most likely be happy to help. In any case, my need for MSDE (this time) is to store web proxy data received from firewalls running Microsoft ISA Server 2000. ISA Server was replaced by Forefront, which was discontinued, but this article could still be relevant. Assumptions
This article is complete, and so detailed that even a complete novice could follow. However, an understanding
of Microsoft operating systems, file systems, and database systems is certainly helpful.
A Microsoft operating system. A really cool thing about MSDE 2000 is that it seems to run on just
about every Microsoft operating system. If you want to mirror my configuration you will need to use
Windows XP Professional (SP1 integrated). But if you cannot, don't stop now. An operating system
difference should not matter at all.
|
|
Procedure
With the preliminaries out of the way, we can get started with this relatively short procedure. |
Unpack MSDE 2000A
After you have successfully downloaded MSDE2000A (self-extracting archive) you will unpack it by running the
the downloaded file. If you'd rather, you could use WinRAR, WinZip or some other utility to unpack the
self extracting archive. However,
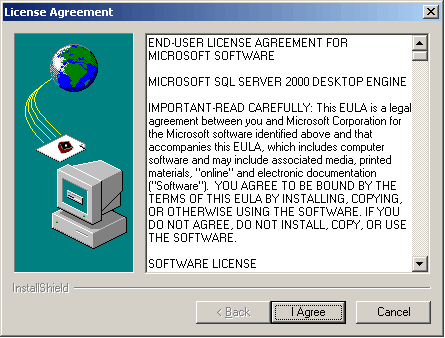
if you are mirroring my steps exactly, simply double click on the executable via Explorer to get the following
dialog:
|
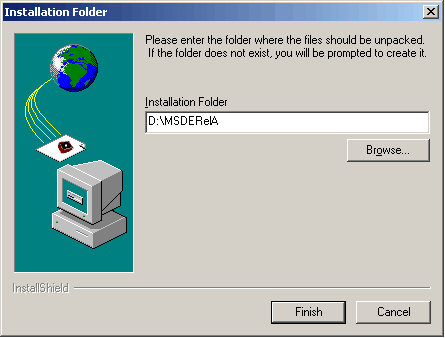
OK, it is important to note that this dialog is simply asking for a location to unpack the instalation files. This
has nothing to do with where the product will be installed. As a matter of fact, after we are finished you can
feel free to delete these files. Later I will inform you as to when this deletion can take place. As you can see,
I chose to unpack the files to a non-system disk, although I
could have chosen the system disk if I had wanted. So, after you figure out an unpack destination directory
click Finish to continue.
|
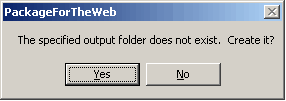
More than likely, you did not create the target directory prior to the unpack. If this is the case, as it
always is for me, you will receive the this warning. Click Yes to continue.
|
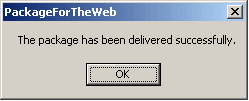
Provided all goes well the unpack procedure will complete successfully and you
receive this message.
|
|
Preparation
I cannot tell you how many times I have "winged it" with software installations of all kinds, on operating systems
of all kinds, without even giving the readme files a second thought. This time however, reading them is necessary
even if you are following this article, unless you are a glutton for punishment. Even if you are, I still
recommend that you take a look at
the readme. The reason for this is that there is some preparation work to do prior to installing MSDE 2000
(running setup.exe). Should I explain the "glutton for punishment" remark? OK. It has been my experience that if
you dork up the MSDE install you are screwed. The product simply does not uninstall nicely, and that is being
kind.
[Options] Not much there eh? First of all the install will fail immediately if you do not supply a "strong" sa password. And, by default, MSDE 2000 is configured for local access only, prohibiting network connections to the database. While this can be taken care of post install, I prefer to take care of it now. I also like using stand alone authentication as opposed to domain-based. And lastly, I require the database files be kept away from the system disk. With these changes, the setup.ini now looks like:
[Options] |
Installation

Now that the prep work is complete, and understood, let's get on with the install. From Windows Explorer, navigate
to where MSDE2000A was unpacked. Double click on setup.exe. If everything has been set up correctly to
this point, you may not see any dialog at all. The actual installation takes only a matter of seconds. The only
dialog you will see, other than an error, will be if
a reboot is required after the install, in which case you will see this:
|
Post Install
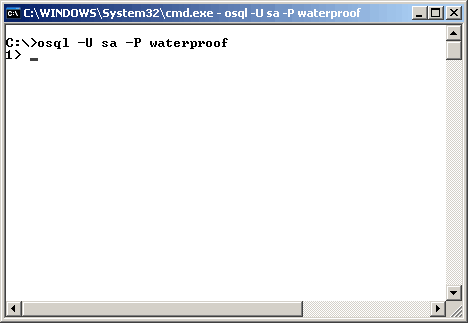
OK, let's run some tests. Perform a basic local connectivity test, using Microsoft's "osql" utility. This
utility is their version of the SQL
comand line utility.
Command(s)
|
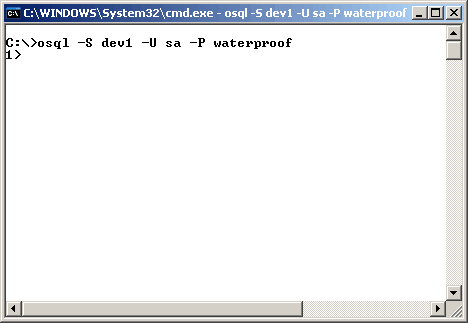
To check for network connectivity, execute the command "osql -S dev1 -U sa -P waterproof" FROM A DIFFERENT
COMPUTER. If executed from the local system, it does not appear (netstat -a) to use the network. I could be wrong
but I do not think so. Another method would be to set up an ODBC connection from a different system
(or perhaps even the local system) and run a connectivity test. In any case, if network connectivity is not
available, you will find out soon enough. The command executed here was from another SQL Server and completed
successfully.
Command(s)
|
Create Database

I am not a SQL Server DBA, and I know that there are many options available for database creation. However,
I have always found that the default create database command seems to fill my needs.
After the database is created it has dynamic growth turned on, and can grow to an infinite size. Below you
can see how simple this command to create a database is. Also note that the database is created in the directory
specified in setup.ini (E:\MSDE2000A\DATA\).
Command(s)
|
|
Create Database Table
Recall my reason for needing MSDE 2000. I need a place to store Firewall (ISA Server 2000) Web Proxy data. Therefore, to create the table I will use a sql script provided by Microsoft that is located on the ISA Server 2000 distribution media (CDROM). In fact, there are three such scripts located under \isa on the CDROM.
Of interest here is w3proxy.sql because it will create the table needed to store Web Proxy information from my firewalls. Below is what the script looks like after my modifications. The top two lines have been added to force the table creation to happen in the correct database. |
|
USE ISA2000 GO CREATE TABLE WebProxyLog ( [ClientIP] varchar(32), [ClientUserName] nvarchar(32), [ClientAgent] varchar(128), [ClientAuthenticate] varchar(5), [logDate] datetime, [logTime] datetime, [service] varchar(16), [servername] nvarchar(32), [referredserver] varchar(32), [DestHost] varchar(255), [DestHostIP] varchar(32), [DestHostPort] int, [processingtime] int, [bytesrecvd] int, [bytessent] int, [protocol] varchar(12), [transport] varchar(8), [operation] varchar(8), [uri] varchar(255), [mimetype] varchar(32), [objectsource] varchar(12), [resultcode] int, [CacheInfo] int, [rule#1] nvarchar(128), [rule#2] nvarchar(128), [SQLserverDateTime] datetime NULL DEFAULT(getdate()) ) GO CREATE INDEX [IX_WebProxyLog_Date] ON [WebProxyLog]([logDate]) ON [PRIMARY] GO CREATE INDEX [IX_WebProxyLog_DateTime] ON [WebProxyLog]([logDate], [logTime]) ON [PRIMARY] GO |
|
IMPORTANT! Please note that I have modified the CREATE TABLE statement above. I have added the last column definition "SQLserverDateTime" which is a time stamp of when the data reached the database server. I will use this in an article following this one. It can be removed ot left in without adversely effecting anything. |
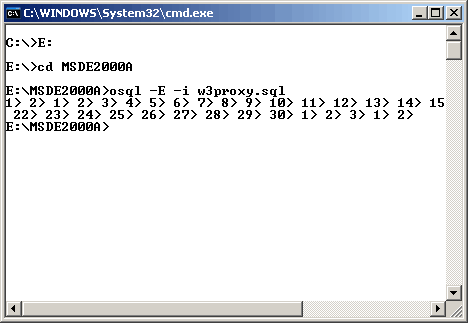
To create the WebProxyLog table use the command "osql -E -i w3proxy.sql" as shown here. The output is a little funky, and does not indicate successful completion, but I assure you that the table gets created. You could always log in and perform a select command to verify. Command(s)
|
|
Create User Grant Access Add Role 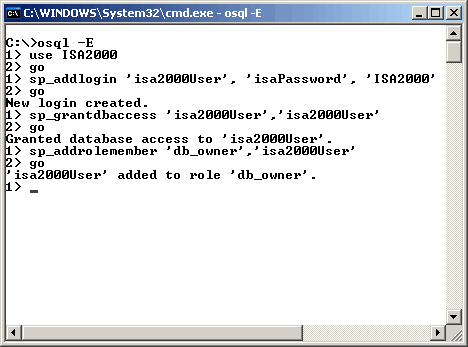
OK, let's wrap up the procedural part of this article. Recall that I have a need to access the WebProxyLog
table located in the new database ISA2000. I could do this with the "sa" account but that kind thing is
severely frowned upon. So I will create a user, grant the user access to login, and make him a database
owner of the newly created database ISA2000, as shown here.
Command(s)
|
|
Summary In closing, the goal of this article was to detail the installation of MSDE 2000 Release A and perform some low level database, table and user setup. It is important to note the non-goals as well. This article is not meant to provide expert advice to anyone about any of the technologies mentioned. Nor is it meant to replace any information contained in Microsoft documentation. However, if it has helped you in any way, then it has served a purpose. Don't forget to leave me your (positive) comments. If deemed important enough to change the article, I will do so and give YOU the credit. Thanks for reading! |
|
Database Table Update
When I originally wrote this article it was to document the procedure used to fill my database needs for MS ISA Server 2000. Since then I have added another ISA Server to the mix and it is the new version ISA Server 2004 Beta 2. This new version requires a modification to the database repository table (WebProxyLog). The modification is as minor as the addition of a few columns. Below is a SQL script that will be used to alter the table. updateW3proxyTo2004.sql |
|
USE ISA2000 GO ALTER TABLE WebProxyLog ADD [rule] nvarchar(128) NULL GO ALTER TABLE WebProxyLog ADD [FilterInfo] nvarchar(128) NULL GO ALTER TABLE WebProxyLog ADD [SrcNetwork] nvarchar(128) NULL GO ALTER TABLE WebProxyLog ADD [DstNetwor] nvarchar(128) NULL GO ALTER TABLE WebProxyLog ADD [ErrorInfo] int NULL GO |
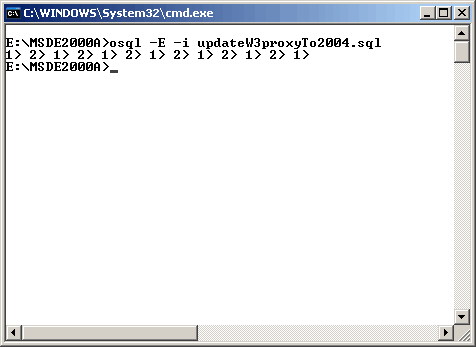
And, of course, you will need to execute the SQL as demonstrated here: Command(s)
|
|
Conclusion
You are now able to store web proxy data from both ISA Server 2000 and ISA Server 2004 Beta 2. Enjoy!
|
|
Printing
As it turns out, as we are busy working on the HTML/CSS/php/Java Script formatting of our articles,
pretty printing is not yet possible. We are working on it at a low priority.
|