|
Tivoli: Installation, Configuration & Replication of TDS 6.3.0.4 On AIX 6.1
(c) brokenribgolfer.com
Date Published: 10.15.2005 Date Last Modified: 02.18.2026 (formatting) In this article we will take you from the basics of installing Tivoli Directory Server V6.3 to configuring a Master-Master (or as IBM calls it Peer-To-Peer) LDAP configuration. Along the way we will also upgrade TDS V6.3 to V6.3.0.4. We will also do a little eWas (Embedded WebSphere Application Server) work. eWas is used by the TDS Web Administration Tool. While this tool is not absolutely necessary to manage TDS, it does come in handy from time-to-time for the novice LDAP administrator (or even the expert when he forgets how to get something done from the command-line). Bare with us during the boring, gui-based installations and upgrades, as we will eventually get to the good part of creating and configuring LADP instances all from the command-line.
Background
After years of struggling with Tivoli Directory Server V6.1, we got, and jumped at, the chance to migrate to V6.3. Notice we say "migrate" as opposed to "upgrade". While it might be possible to upgrade, it is far cleaner to migrate. What makes it so easy is really just the nature of LDAP and ease of migrating schemas and data. Perhaps there are more difficult LDAP configurations where an upgrade would be a better fit, but here with a rather simple Master-Master, no SSL configuration, the migration worked just fine. While others may or may not have had bad experiences with V6.1, we definitely did (on AIX 5.3). We had periods of frequent crashes and hangs. Coming from the Netscape / Sun LDAP world, I was not accustom to any LDAP problems. AssumptionsAs always, we try to cover every little detail in an article, always trying to set us apart from the "other guy" so-to-speak. However, a good working knowledge of AIX and LDAP will be of great assistance when following this article. Requirements
Requirements for duplicating this exercise in your environment are:
Optional requirements for this exercise are listed here. At the time of this article's publication, the following IBM product codes were used. We realize that product codes can change or that the products were instaled via DVD or CD-ROM. It is important to note that the two products listed here, even though it may not look like it later in the article, are totally seperate.
|
Architecture
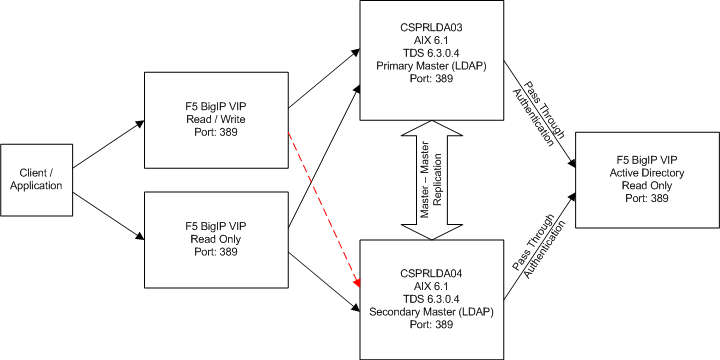
This diagram depicts the architecture used for this article. This multi-tiered architecture
protects the Active Directoy server data as the only access to it is a read-only connection from
the Tivoli Directory Servers.
|
|
Scripts
Throughout this article/procedure, certain scripts are executed, sometimes without explanation. Here are the scripts
available for download.
|
|
Procedure
Now that we have laid the groundwork, let's get going with the actual steps. |
Pre-Installation Work

As noted above in the Architecture section of this article, the primary and secondary LDAP servers
(LPAR's) are CSPRLDA03 and CSPRLDA04, respectively. These LPAR's have been configured exactly in
the same manner with exactly the same resources, and on different managed systems for a more
highly available replicated LDAP resource. As we have received these like systems from our AIX
system administrators, we will configure them identically as much as possible.
Command(s)
|
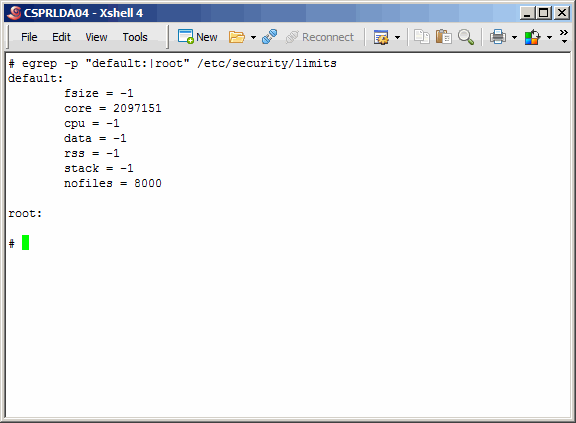
Also verify the ulimits on the secondary master. Command(s)
|
We will use the script buildFileSystems.sh to create logical volumes and map them to file systems. Notice the TDI directories; they will not be used during this exercise, but will be used in a follow-on article. The primary master alone will house TDI. Command(s)
|
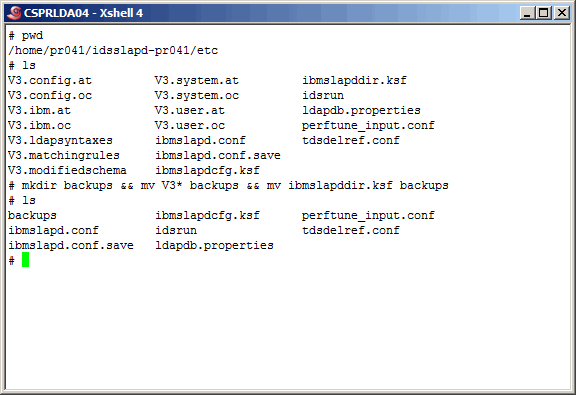
Same script, minus the TDI mount points, used here to configure file systems. Notice the last two lines. For some unkown reason, IBM's TDS and DB2 will not install into a directory with ANY file in it, including lost+found. We remove the file. It can probably be added back after the install; we do not bother. Command(s)
|
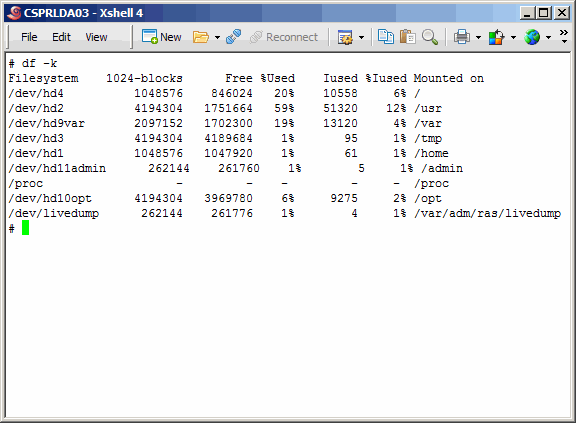
Screenshot of the primary master before creating and mounting the file systems. Command(s)
|

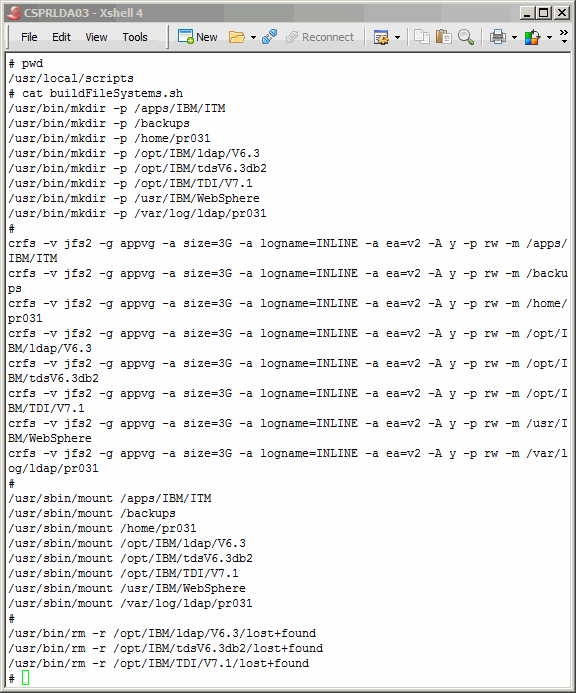
Execute the buildFileSystems.sh script on the primary master. Command(s)
|
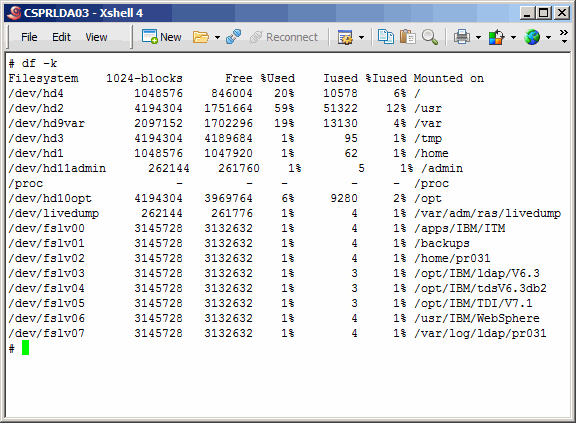
Now a picture of what the file systems look like on the primary master. Note that the file systems under /opt are the default locations where the IBM installers will want to lay down the software products. Command(s)
|
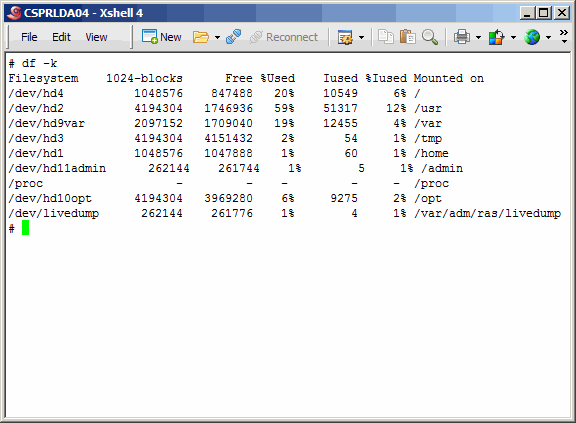
Now the secondary master, before file system creation. Command(s)
|
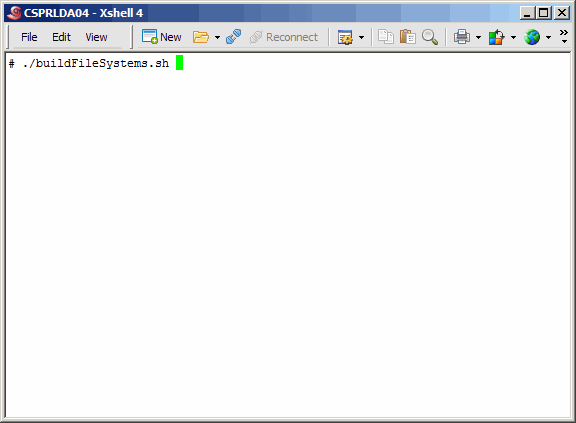
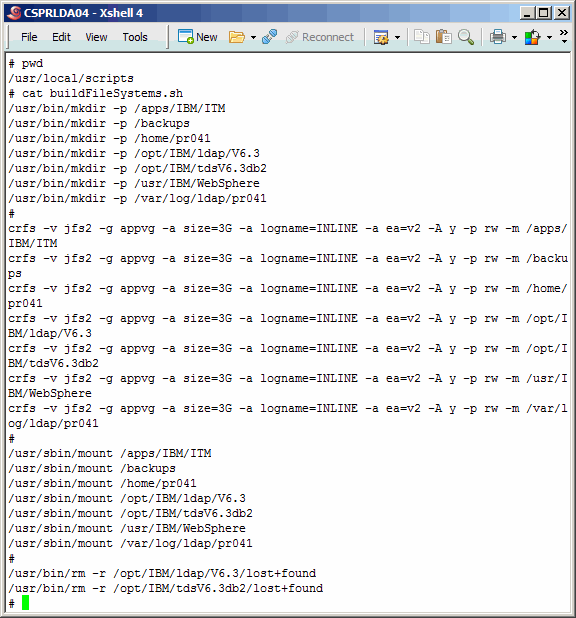
And run the script on the secondary master. Command(s)
|

Without TDI, a slightly different file system layout on the secondary master. Command(s)
|
Install TDS On Primary Master
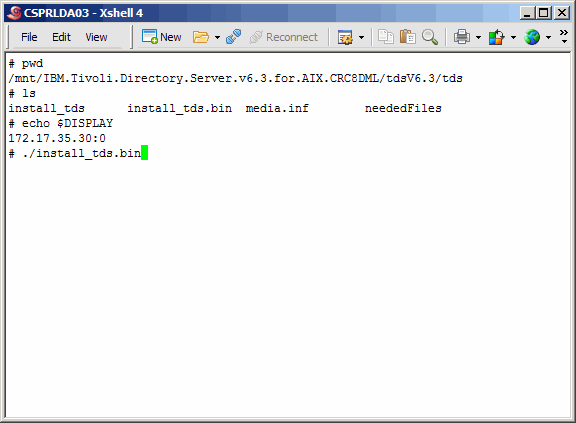
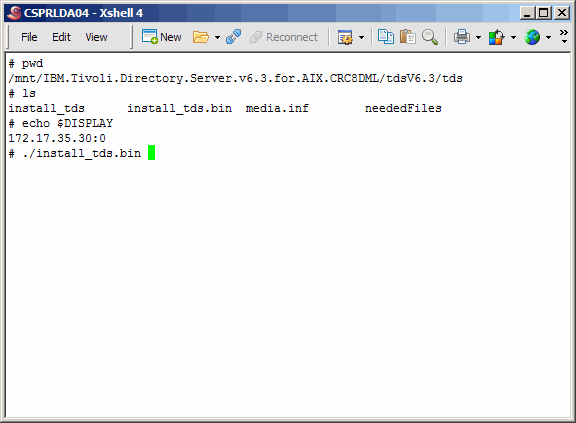
Wherever you decided to expand the product media, drill down in the directory structure
as shown here and execute install_tds.bin. Of course you must have your X-Windows
server running on your PC, and you must first set your DISPLAY variable on the UNIX
server, as we have already done.
Command(s)
|

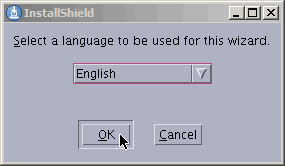
Choose your language. OK....... |

Splash screen for your viewing pleasure. |

Next....... |
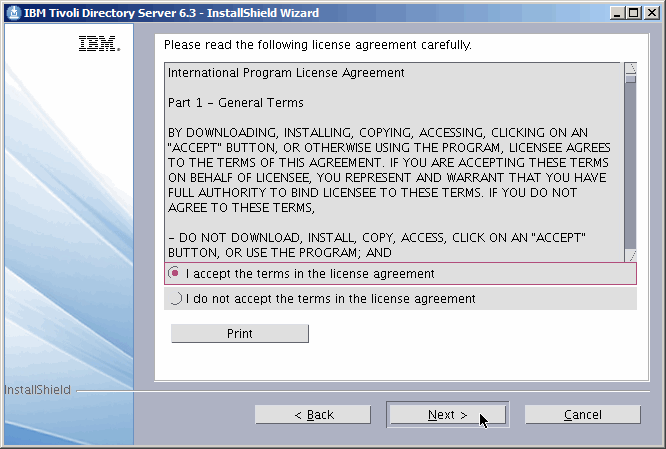
Accept agreement and Next....... |

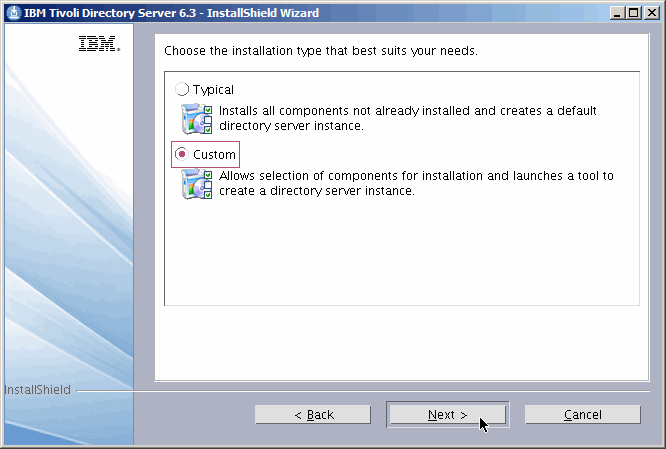
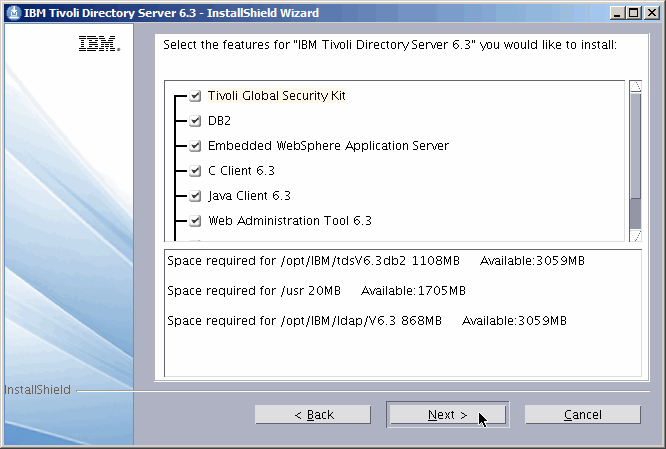
Always choose "Custom". It will show you what the defaults are. Next....... |

The default seems to be to install everything. We are not hurt by this. Next..... |

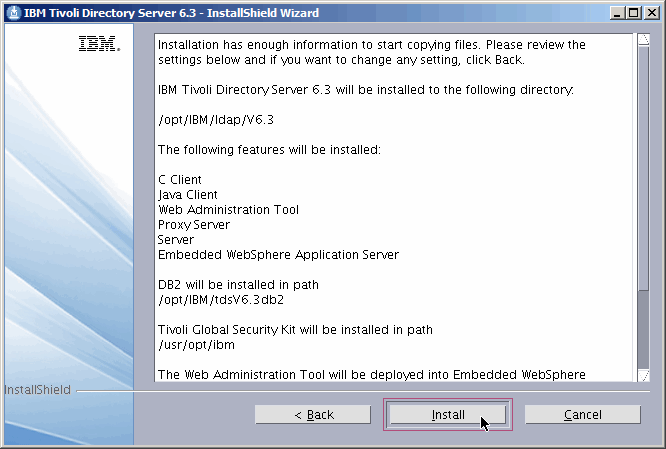
Verify your choices, Install......... |
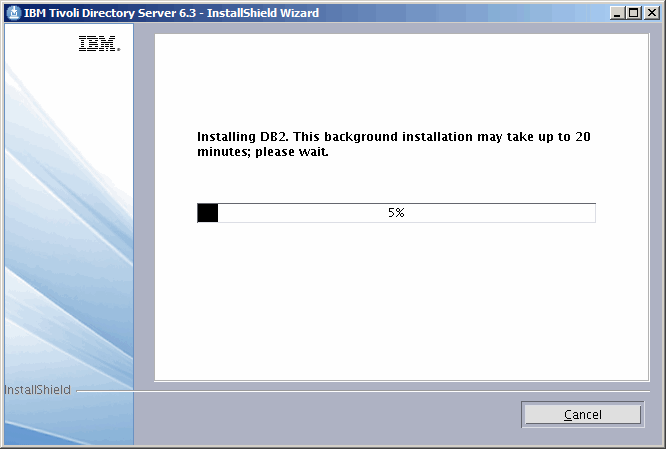
Viewing pleasure...... |

Viewing pleasure...... |
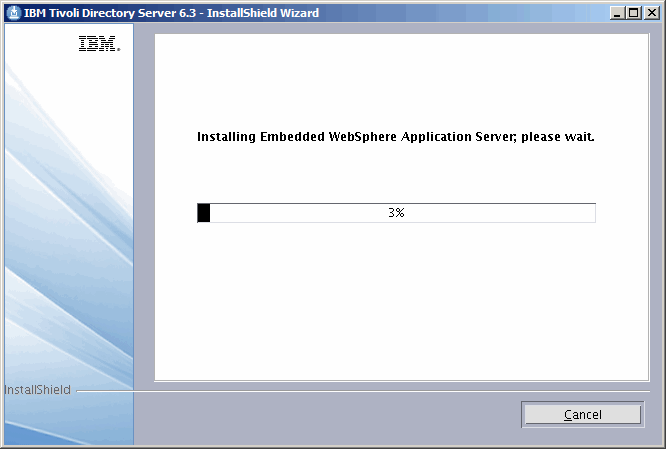
Viewing pleasure...... |

Viewing pleasure...... |
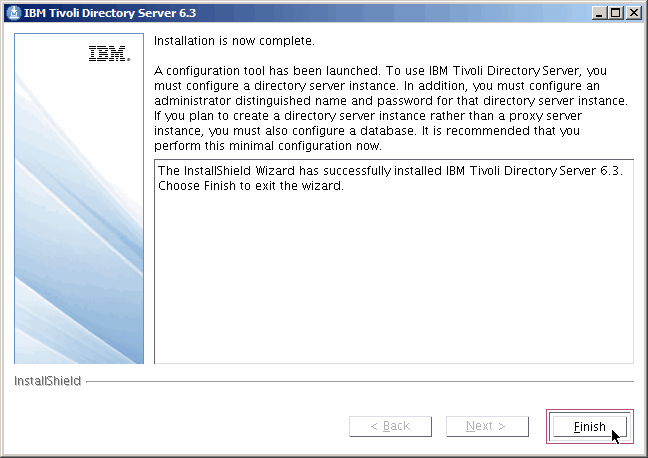
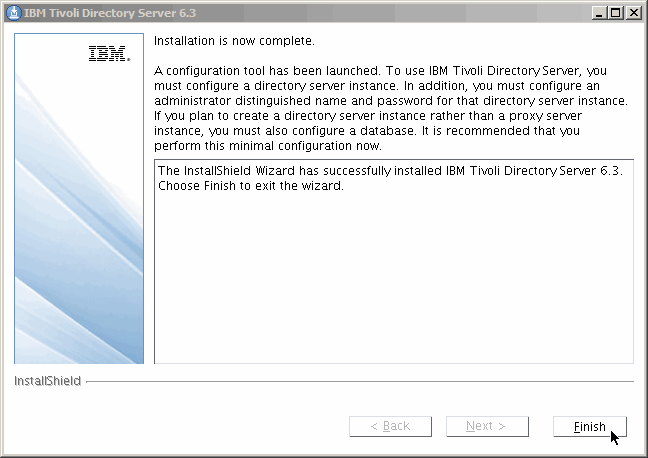
Finish.......... |

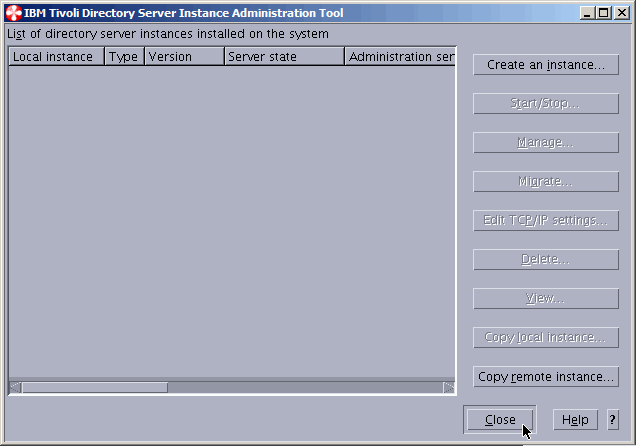
We do not want to create an instance via the gui; we will use the command line later. Close........ |
Yes, we are sure. |
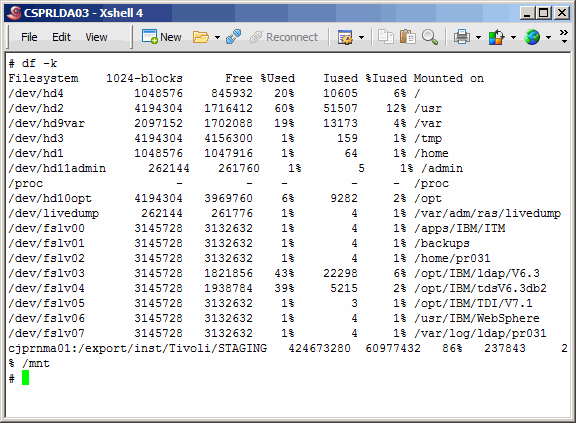
Now if we take a look at the file systems we see that the TDS
and DB2 file systems are being used.
Command(s)
|
Install TDS On Secondary Master
We will be far less "wordy" in this section. We really only include it
as a record of the installation. But again, start by executing
install_tds.bin.
Command(s)
|
Select language. OK......... |
Splash screen..... |
Next........ |

Accept and Next......... |
Custom, and Next...... |
Verify and Next....... |
Install....... |

Viewing pleasure....... |
Viewing pleasure....... |

Viewing pleasure....... |
Viewing pleasure....... |
Finish......... |
Close........... |
Yes..... |

Yes, we are sure. |
Upgrade TDS On Primary Master

Updating TDS is a bit different than other products. And usually it involves
updating the eWas console application as well. It certainly did this time so
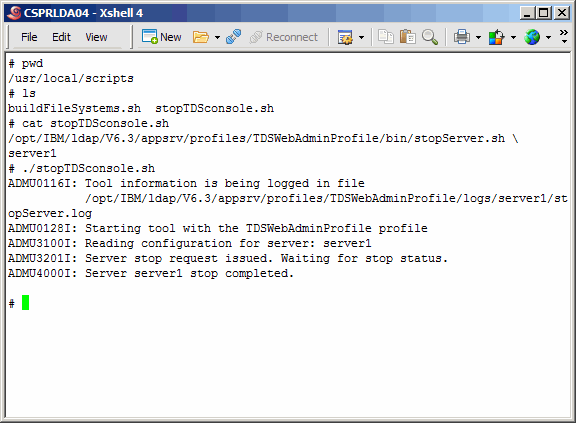
we will go over that as well. But first, we need to shut down anything currently
using LDAP (nothing since we never created any LDAP instance), and also the
eWas server. As it turns out, the installation of TDS starts the server and leaves
it running after the install is complete.
Command(s)
|
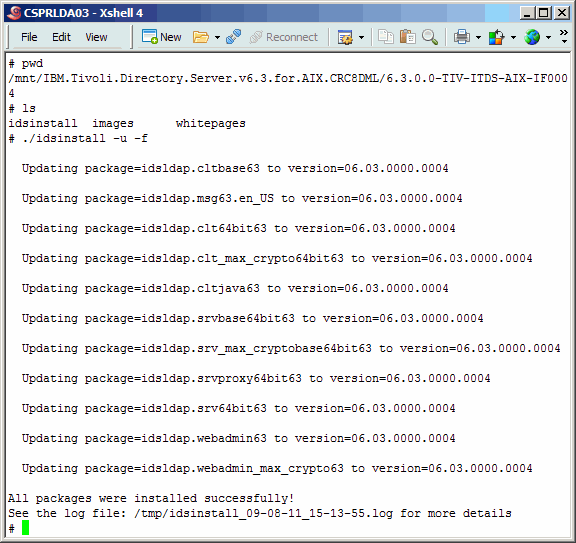
After unpacking the TDS 6.3.0.0 FP4 archive, drill down and execute the idsinstall
script. All it really does is install the new TDS binaries via the rpm command. Be sure
to use the command line arguments as we show here.
Command(s)
|
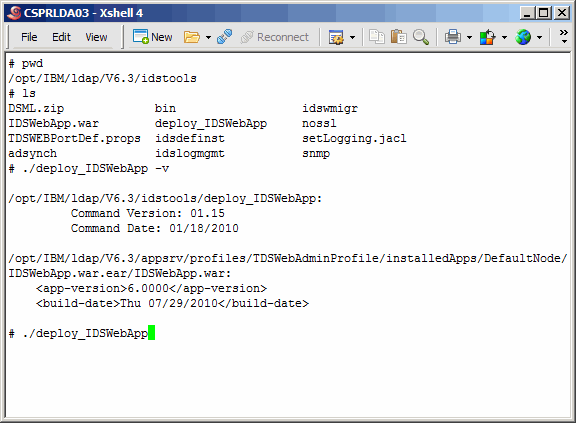
Assuming that the previous step was successful, let's see if we need to update
the eWas console application. This can be done as shown here. The output shows that
the application version is 6.000. In the README that comes with the Fixpack, you
will see that the current application version is 6.0001. Therefore we will upgrade. The
upgrade is accomplished by running the same command, without any arguments.
Command(s)
|

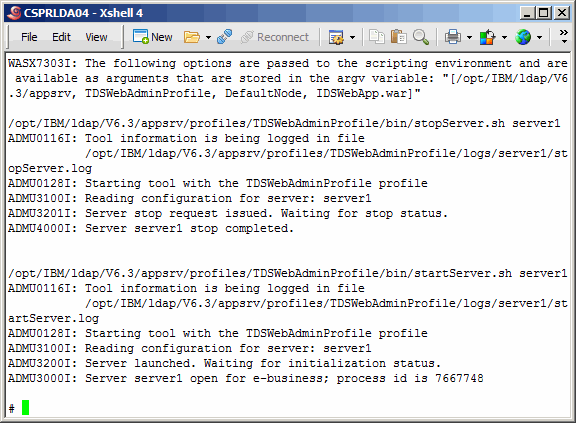
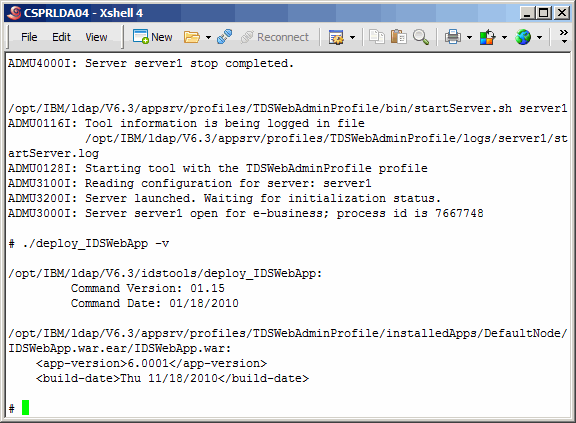
The upgrade will stop the applcation server, deploy the new application and
then start the splication, as shown here. On our system it took about five minutes to complete.
|

Run the version command again to see that indeed version 6.001 is now
installed.
Command(s)
|
Upgrade TDS On Secondary Master
Once again, this procedure is exactly the same on the secondary LDAP
master, and we will not be as verbose as the first time around. We leave
tis in s a log of our activities only.
Command(s)
|

Install the new TDS binaries....
Command(s)
|

Install the new spplication server.....
Command(s)
|
On our server, the applicaiton server install took five minutes.....
|
Verify all is well.....
Command(s)
|
Upgrade eWas On Primary Master

As we have discussed, and shown during the install, when installing TDS
we also installed the Embedded WebSphere Application Server (eWas) version
7.0.0.0. At this time, we might as well install the latest version of eWas,
7.0.0.13. Compatibility for this version can be checked on the same part of
IBM's website where we retrieved the Fixpack.
If you go back to the requirements section of this article, you will notice
that we created a file system (/usr/IBM/WebSphere), and we will install the
eWas Update Installer to an appropriate subdirectory of this mount point.
Separation of file systems makes managing a server so much easier.
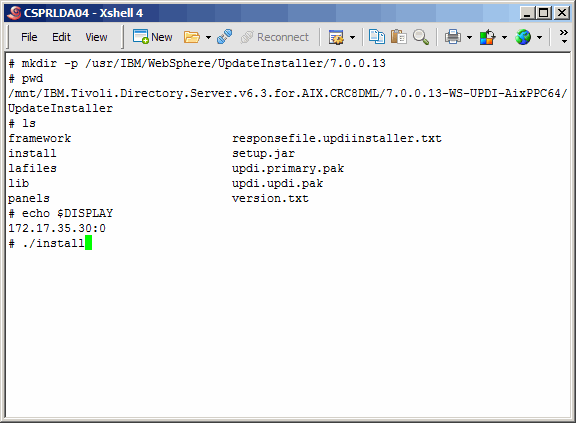
Now, after expanding the the Update Installer archive (7.0.0.13-WS-UPDI-AixPPC64),
drill down and execute the install command as shown here. Be sure, once again, to
have your local X-Windows server running and to have your UNIX DISPLAY variable
exported.
Command(s)
|
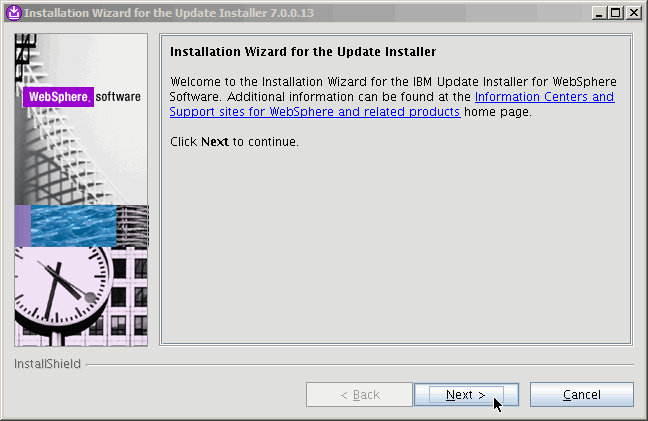
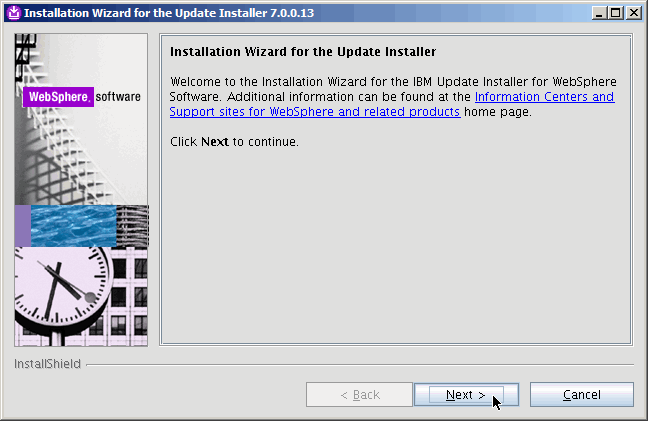
Next.......
|

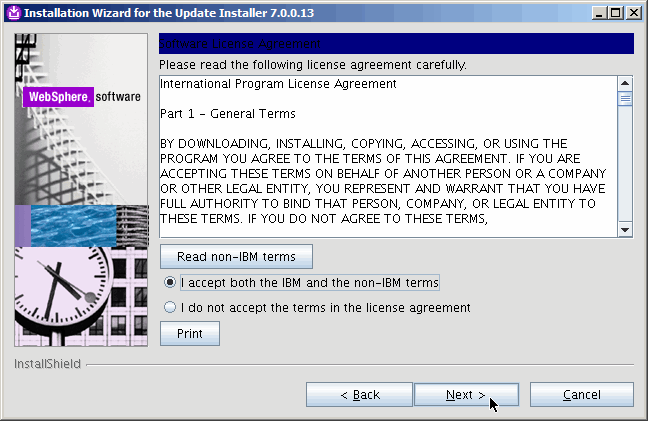
Agree to terms, and Next......
|

Next.........
|
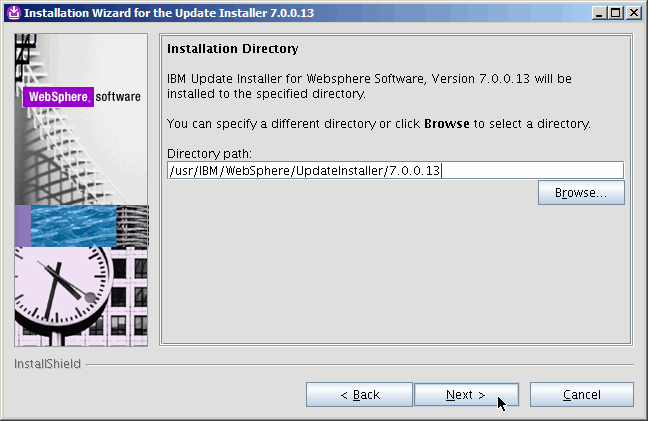
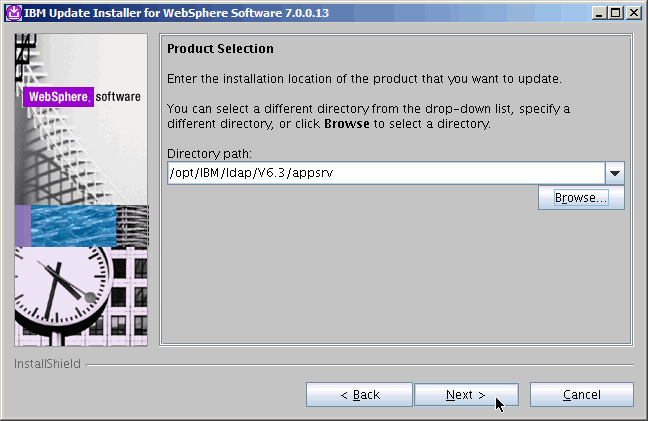
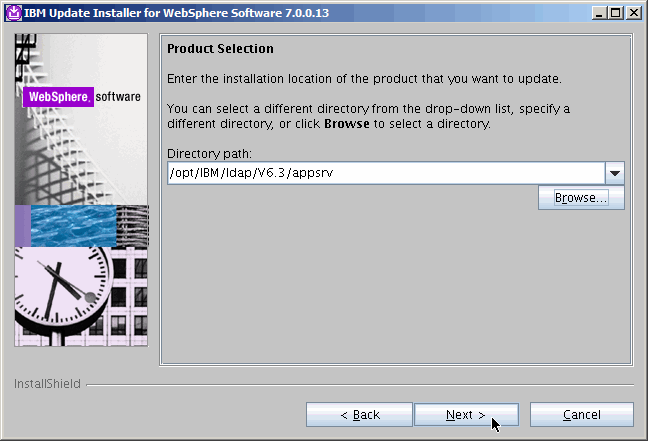
Indicate the appropriate location for the update installer. Remember, the
update installer is simply used (once installed) to update eWas. Also, this
installer will not create the directory for you; you should have done that
prior to this step. Next...........
|

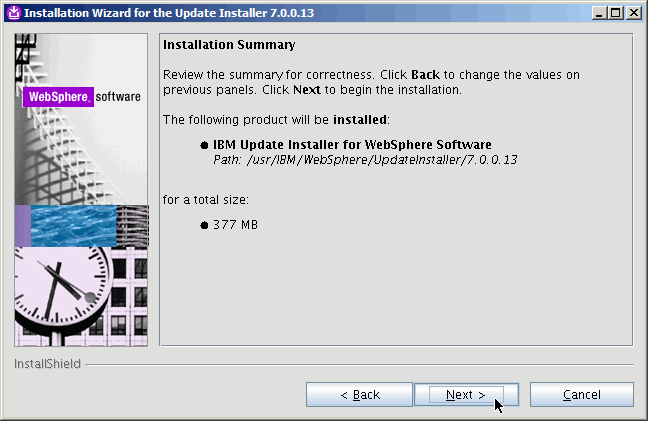
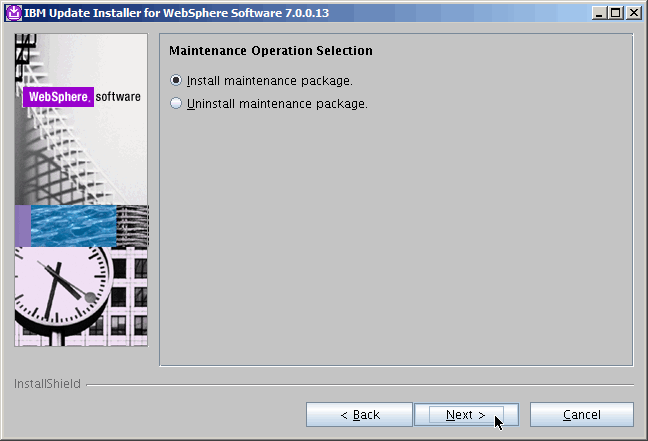
Pretty fast install. Next.......
|

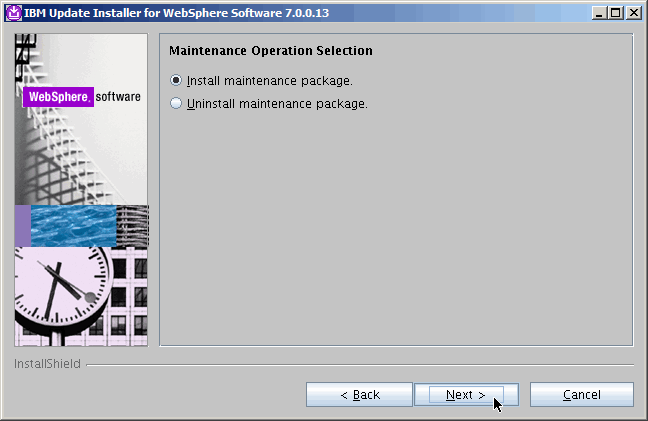
We uncheck the box to run the Update Installer, as we need to bring down
the application server first.
|
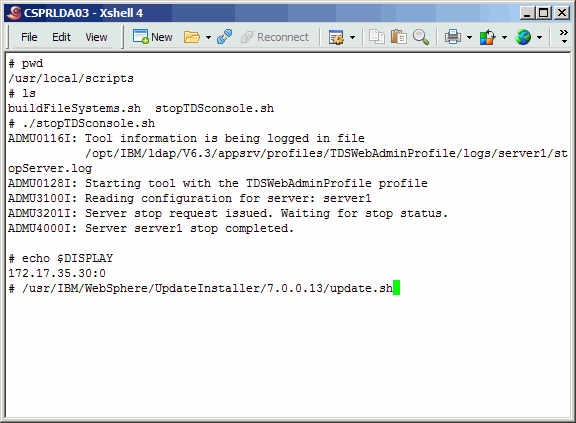
Stop the application server and then run the Update Installer as shown.
Command(s)
|
Next..........
|
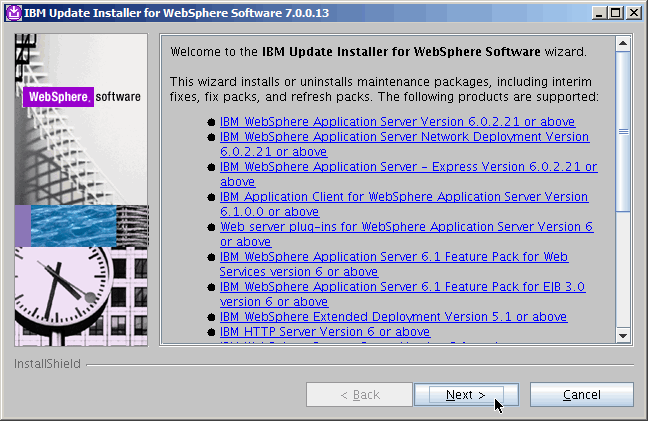
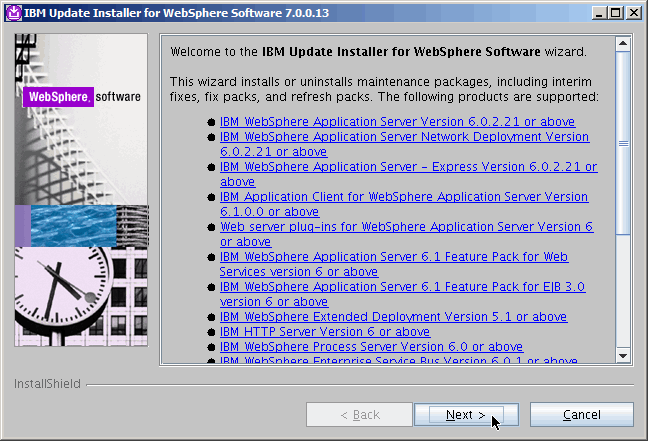
If the Update Installer finds the application server on it's own, great. However
it should appear as shown here. If not, make it so. Next........
|
Next.......
|
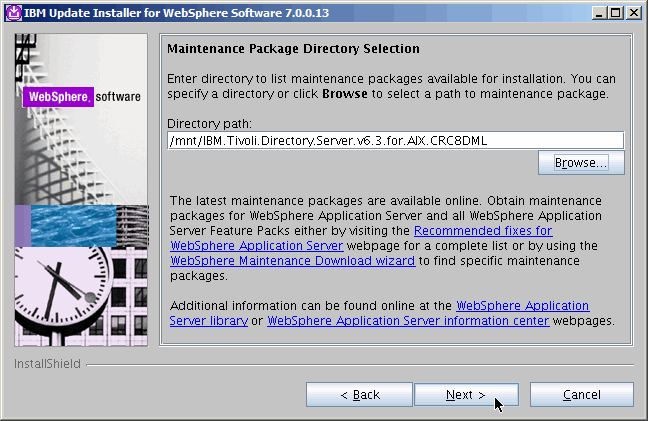
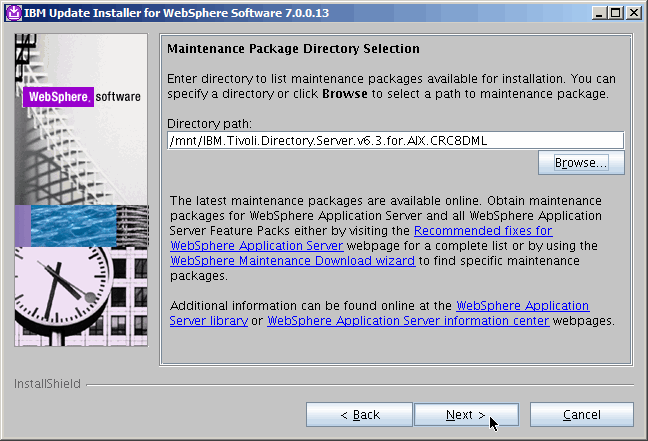
Pick the location where the eWas update was stored. If this is a bit confusing,
remember that everything we are using for this update is included on IBM's website.
We will not include the current link because it most likely will change, Just perform
an internet search like "Recommended fixes for Tivoli Directory Server" and
you will find the link.
|
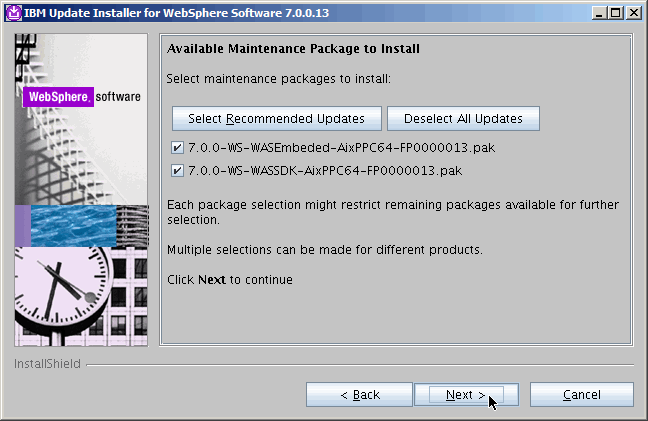
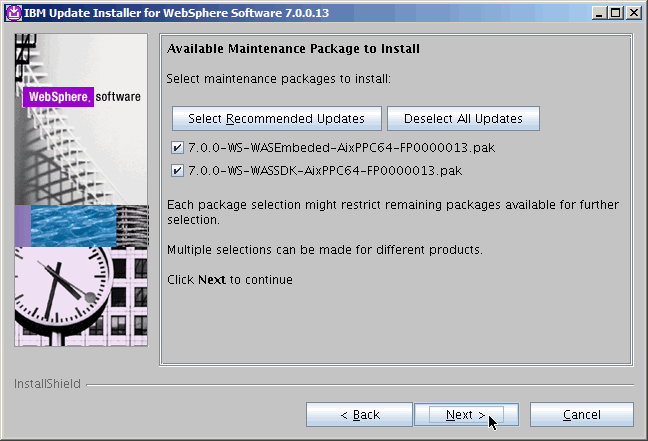
If you see the screenshot here, you have done everything correctly. You will
want to install both maintenance packages as shown. Next.......
|

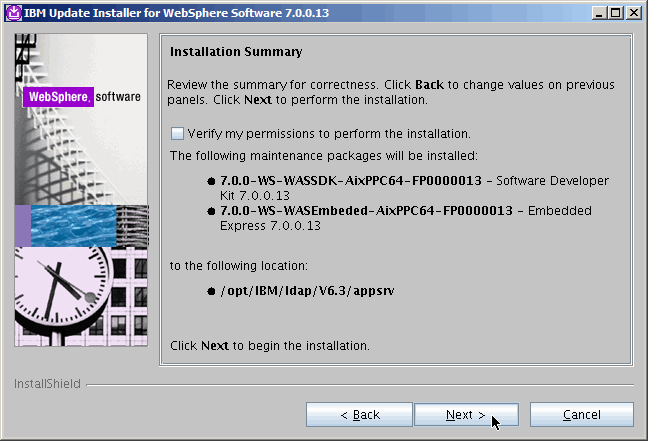
Last chance to change your mind. Next........
|
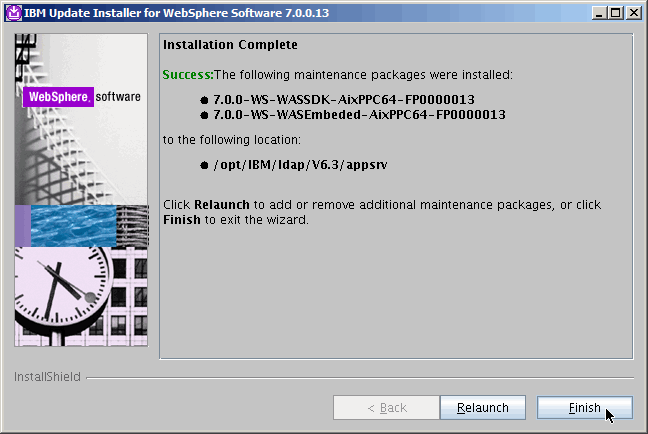
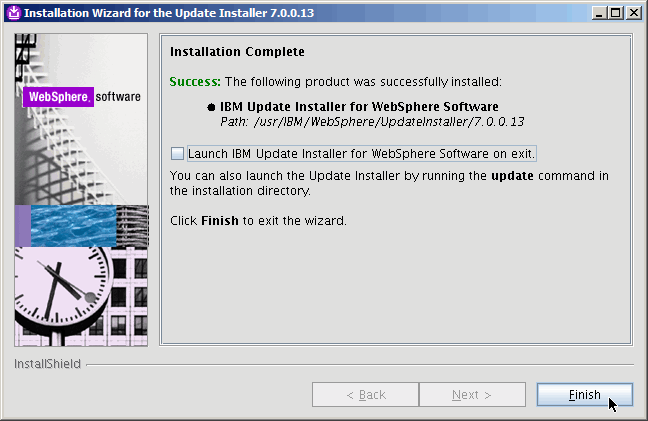
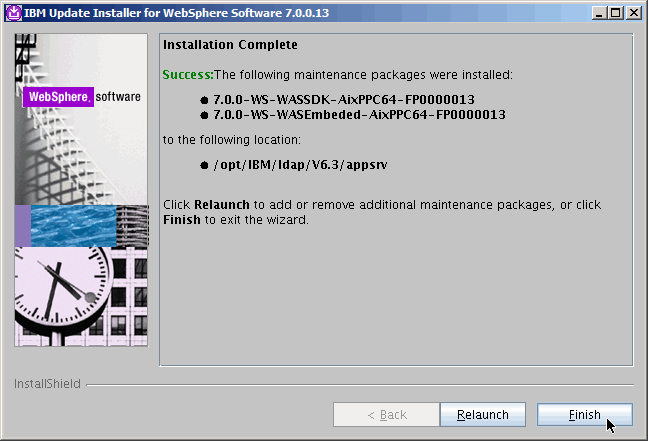
All done. Next..........
|
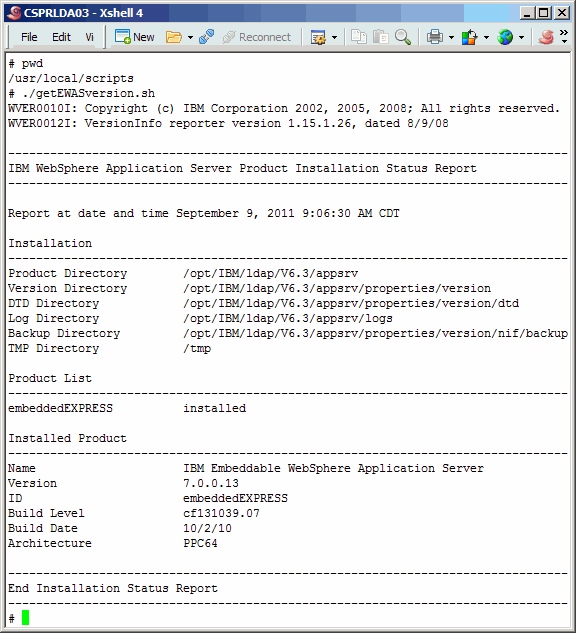
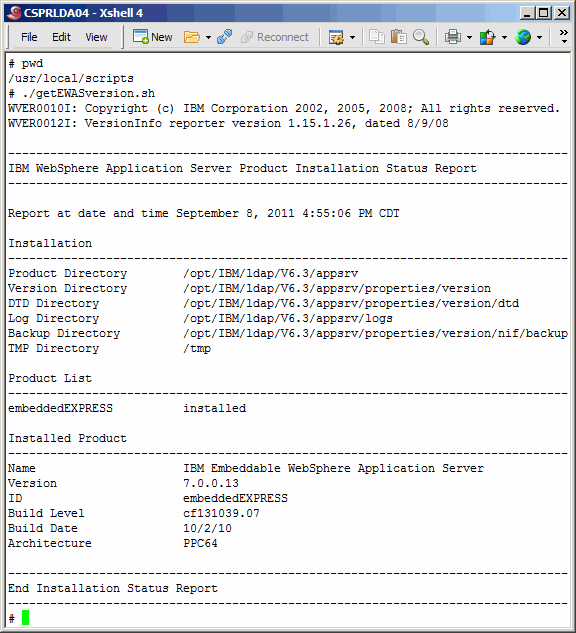
Here we verify that the new eWas version has been installed, however we
seem to have neglected showing you the actual command in the screenshot.
Command(s)
|
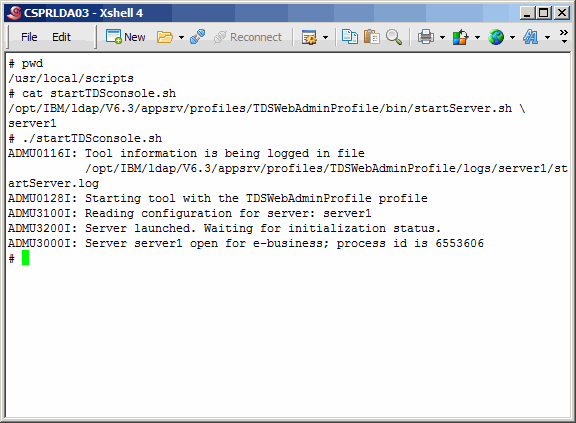
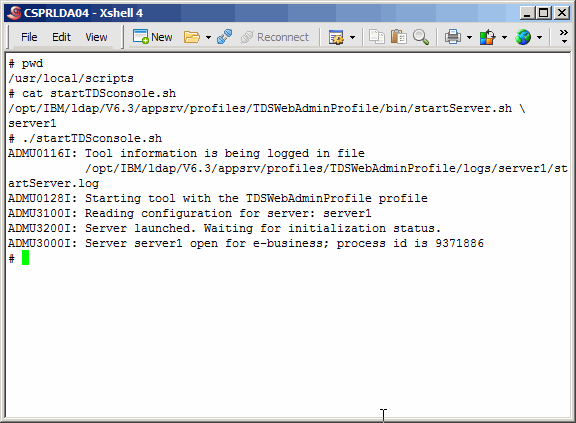
Let's start the TDS Web Administration Tool. This is the application
that runs on eWas.
Command(s)
|

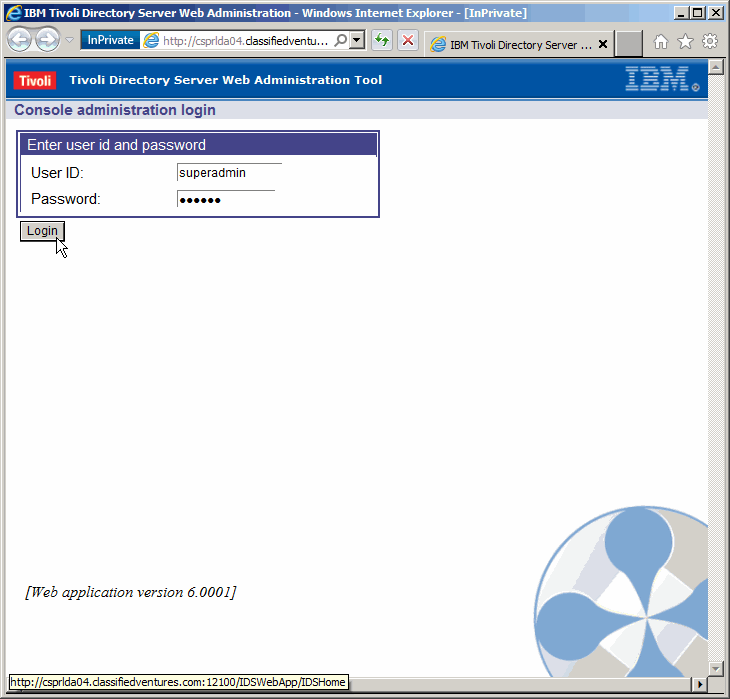
Log in as "superadmin". The default password is "secret". We will not change
the password in this article, but it is always a good idea to steer clear of
using default passwords.
|

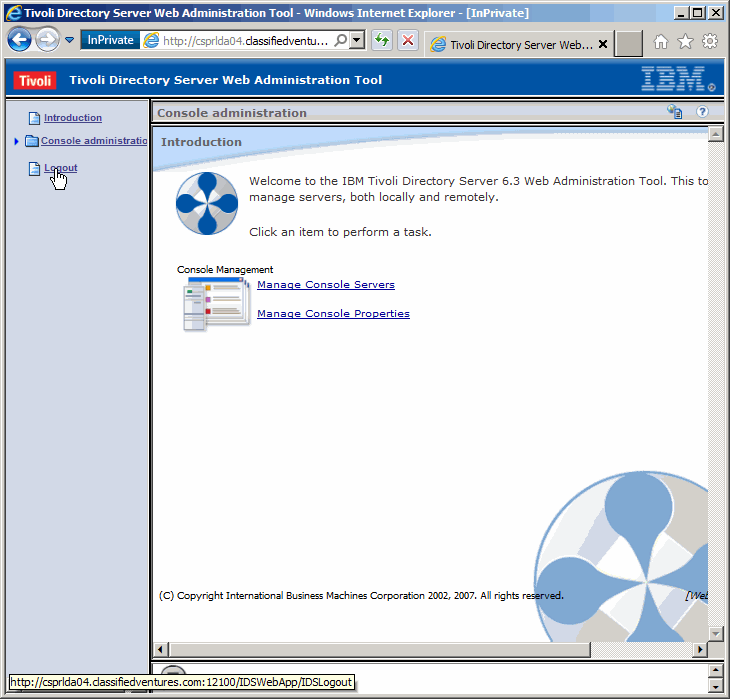
Log out of the console. We only wanted to verify that we could use it. Eventiually
you will want to configure the console but that is outside the scope of this article.
It would not be possible at this point anyway, as we have no LDAP instances running
on this server. You could however configure the console to manage other TDS instances
running on other servers.
|
Upgrade eWas On Secondary Master
And again, we will just be "going through the motions" upgrading
the secondary master server. Execute the install script as shown.
Command(s)
|
Next...........
|
Accept and Next.........
|
Next.............
|

Where to install, and Next........
|
Verify. Next.........
|
Done. Finish........
|

Shutdown the application server and run the Update Installer.
Command(s)
|
Next......
|
Update the correct eWas software. Next......
|
Next.........
|
Select package depot location. Next.....
|
Next...........
|
Verify. Next.........
|
Done. Finish.........
|
Verify the eWas update.
Command(s)
|
Start the application server.
Command(s)
|
Log in to the TDS web console.
|
Logout.
|
Post-Installation Work
As we did in the pre-install work at the beginning of this article,
we will perform the post-install work on both the primary master and
secondary master in the same article section. This work is actually
completely optional. Or you may have other ways of achieving the same
or better configuration results. We will begin by editing the system-wide
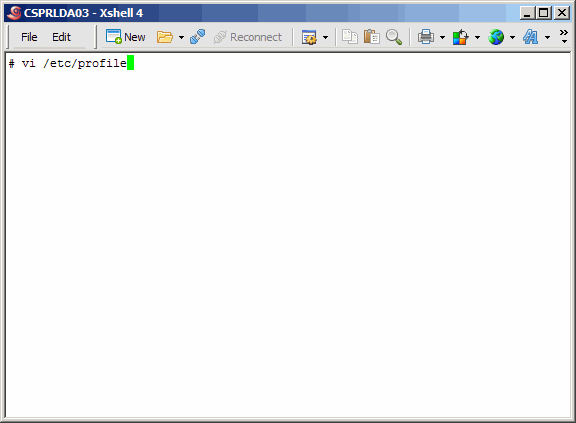
profile, to make a change.
Command(s)
|
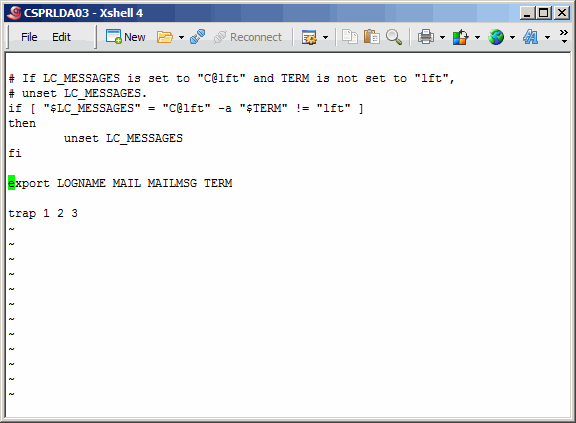
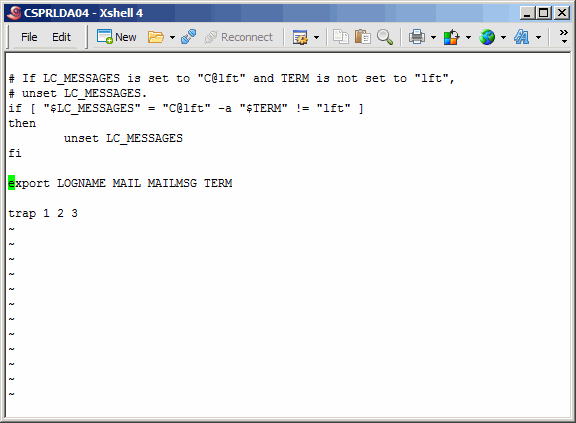
Jump to the bottom of the file. If you are using vi or vim, this is done
using a shift-g combination.
|

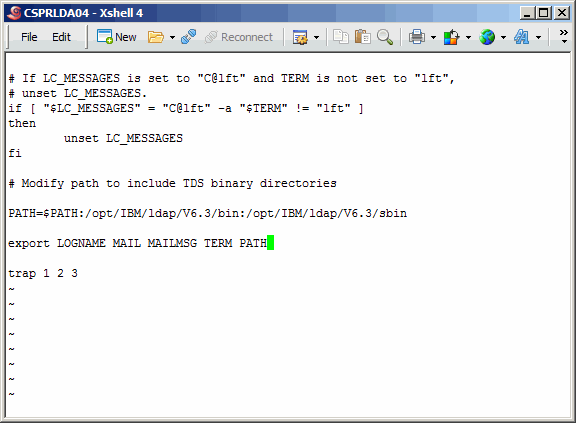
Modify the PATH variable as shown. Save an exit.
|
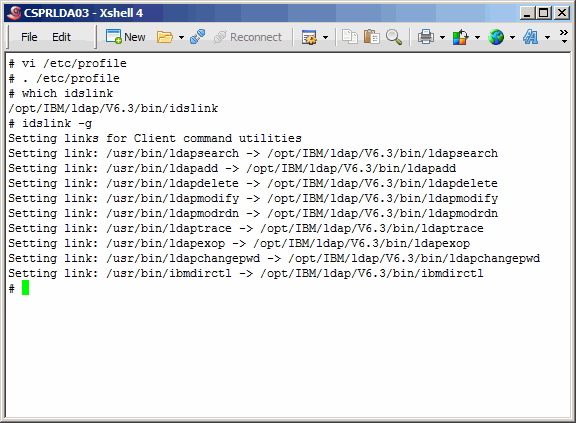
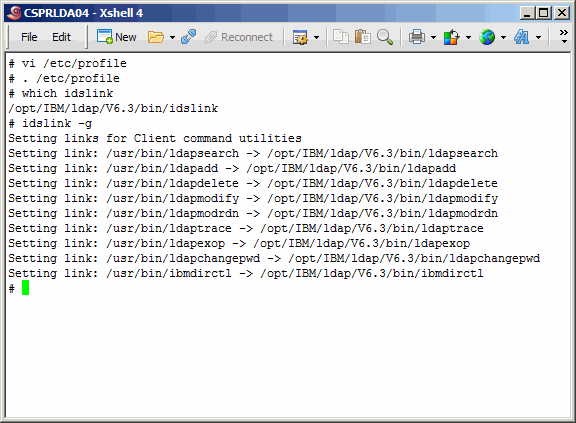
Source /etc/profile. The which command verifies that your path has been
correctly set.
Command(s)
|
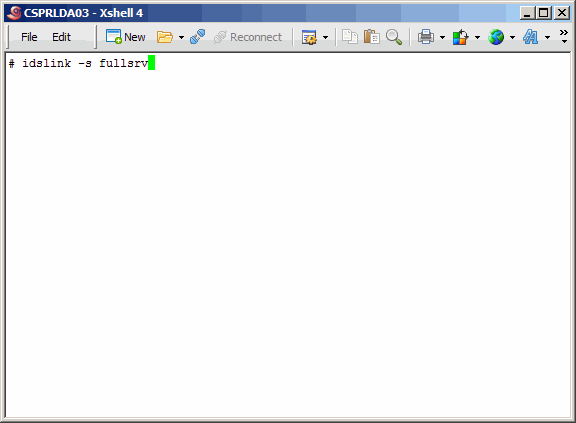
Here we use the idslink command to set up links for generic client utilities.
Command(s)
|
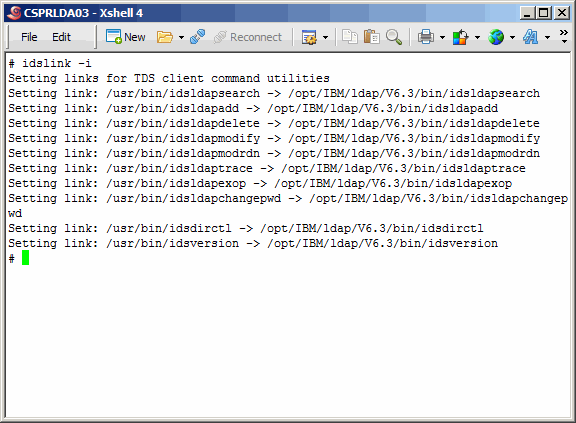
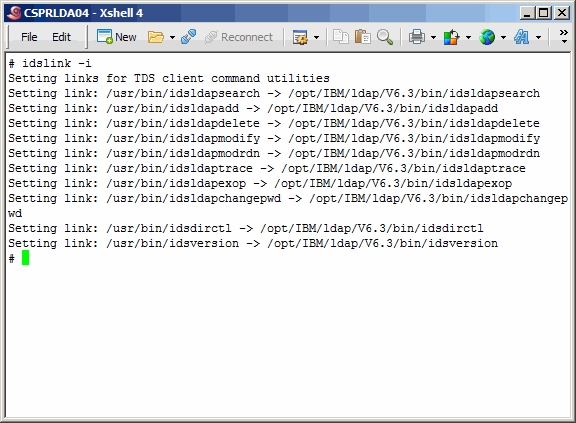
Now set up links for IBM-specific client utilities.
Command(s)
|

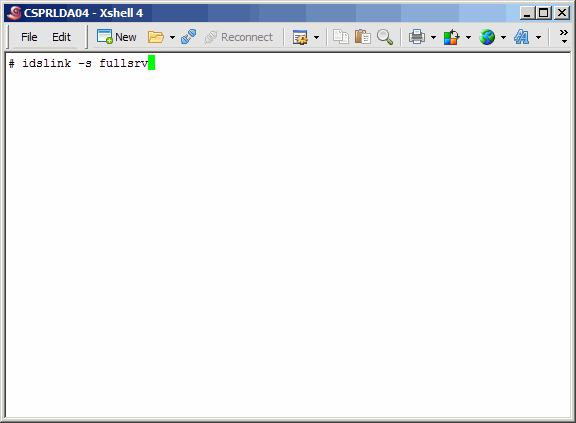
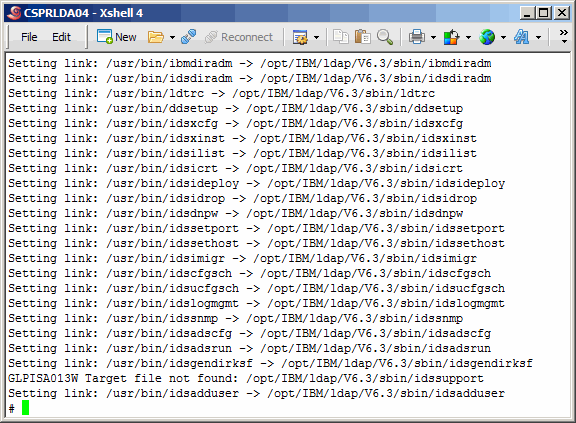
Here we see the many links being created for a plethora of other TDS-related utilities.
|
Repeat for secondary master.
Command(s)
|
Repeat for secondary master.
|
Repeat for secondary master.
|
Repeat for secondary master.
Command(s)
|
Repeat for secondary master.
Command(s)
|
Repeat for secondary master.
Command(s)
|
Repeat view for secondary master.
|
Configure Primary TDS Instance
Now it is finally time to begin the fun work; that of creating and configuring
LDAP instances. In this section we will do some UNIX work as well as TDS work.
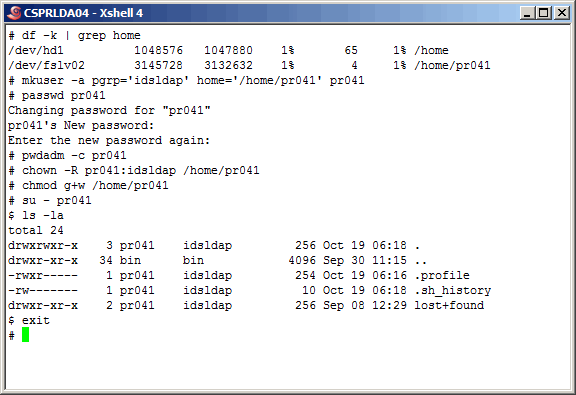
Let's start by creating the UNIX user that will own the LDAP instance on the
primary master server. When TDS is installed, the UNIX group "idsldap" is created,
and two UNIX user accounts are added to the group: "root" and "idsldap".
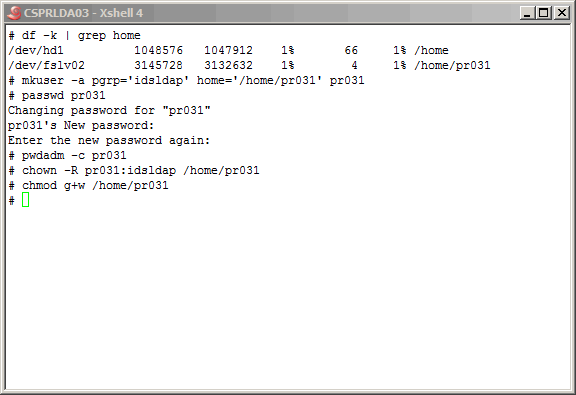
We will use that group as the instance owner's primary group, as shown here. After creating
the user, set the password, and use the "pwdadm" command to to release the user from
having to change the password. And finally, make the user's home directory writable
for anyone in the "idsldap" group. This is important as we are using the "root" account
to create the instance, and the "root" account is in the "idsldap" group.
Command(s)
|
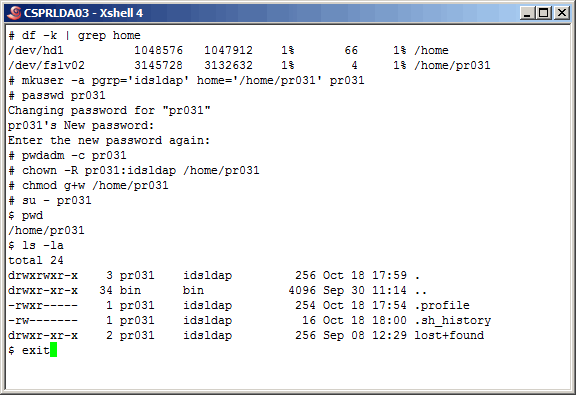
It's not a bad idea at this point to "su" to the new user account and poke around
a bit as we do here. Looks good.
Command(s)
|
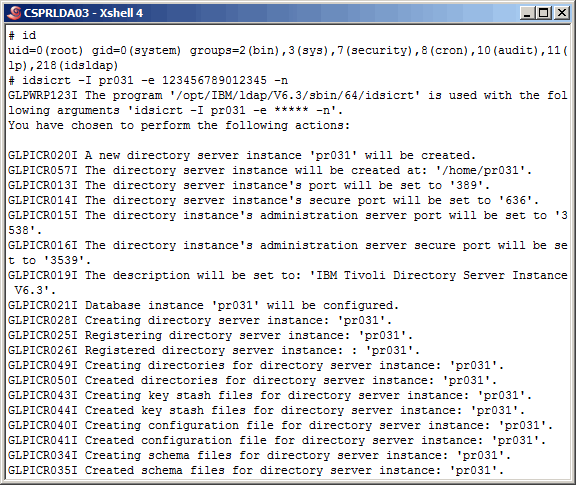
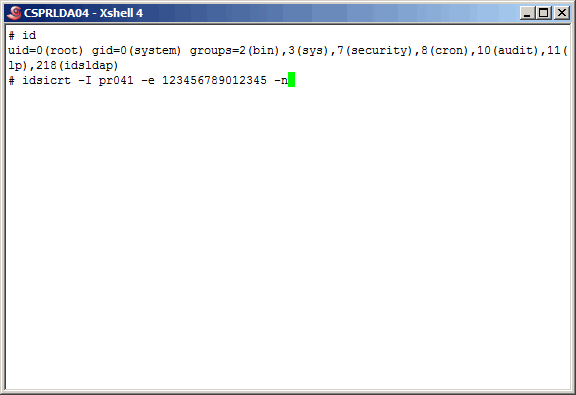
Using the "idsicrt" command, create the LDAP instance, as shown here.
Command(s)
|
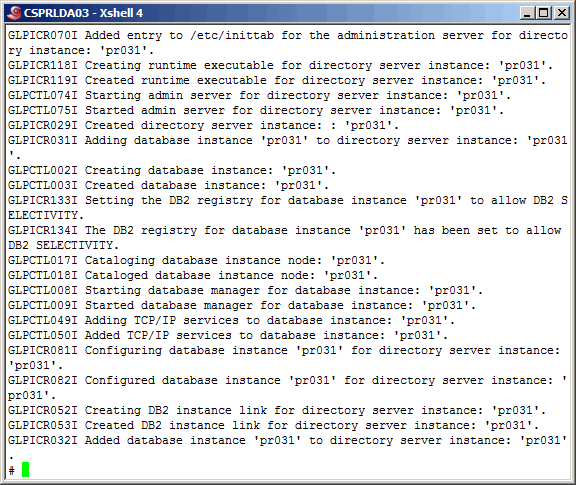
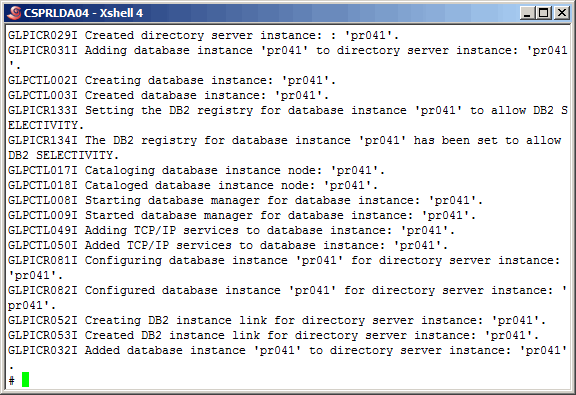
More output from the "idsicrt" command here. During a migration, after creating the
instance as we do here, would be the time to migrate the schema and perhaps the
keystash file. We will do just that when we create the replica on the secondary master.
|

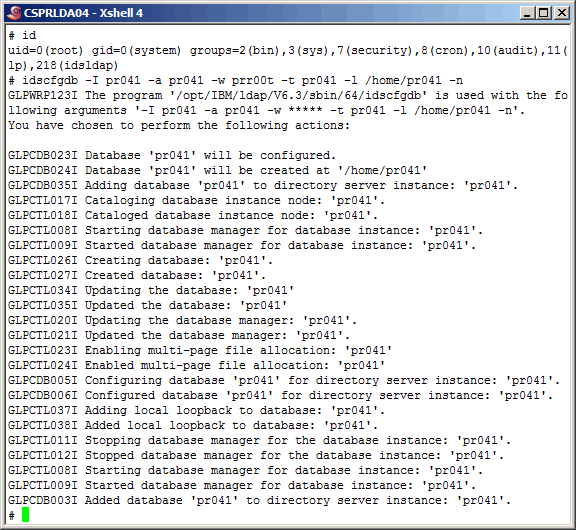
Now let's use the "idscfgdb" command to configure the new LDAP instance database.
Command(s)
|

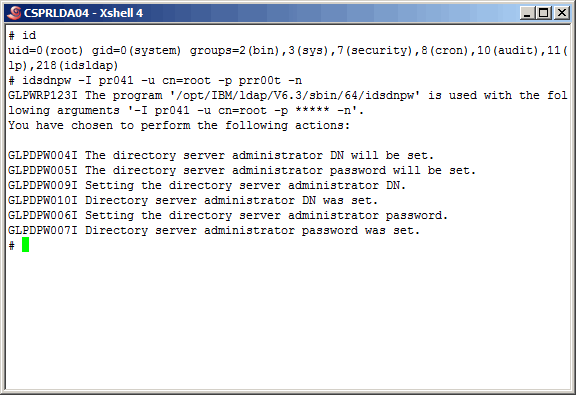
Create the primary instance administrator account and set the password.
Command(s)
|
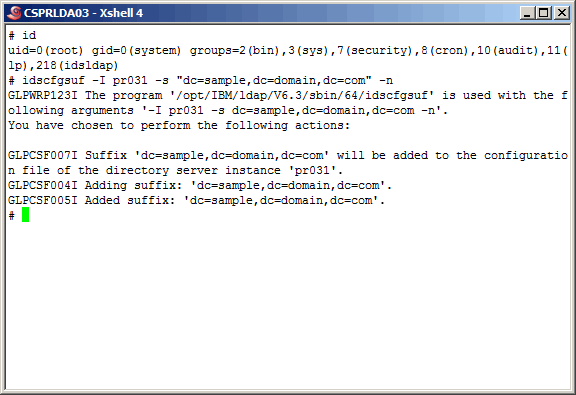
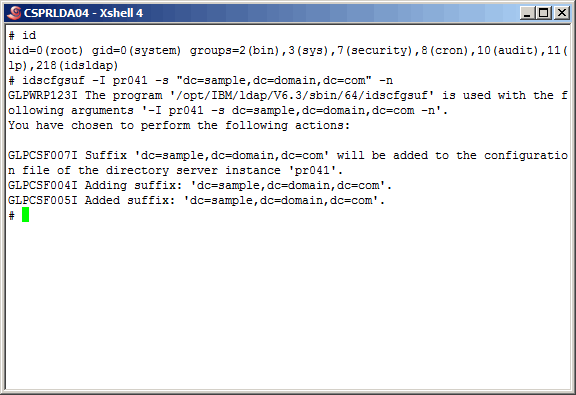
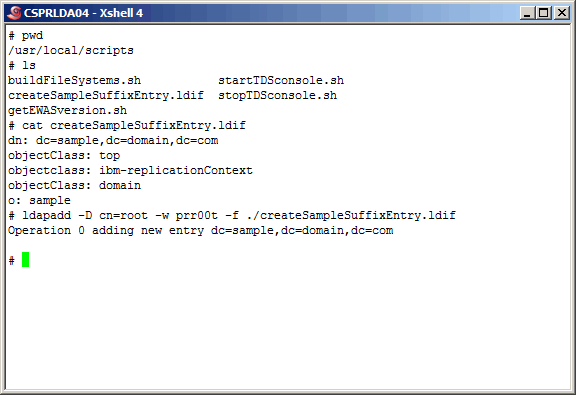
Create the suffix "dc=sample,dc=domain,dc=com" using the "idscfgsuf" command.
Command(s)
|
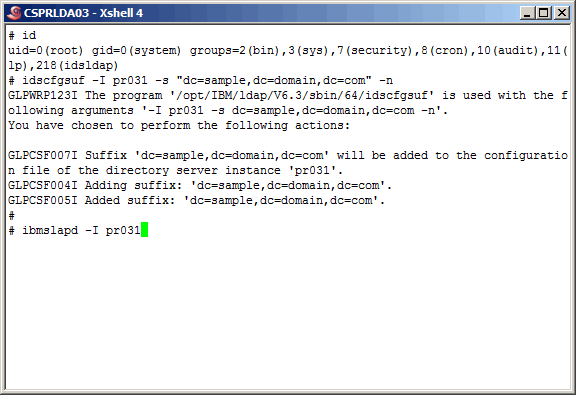
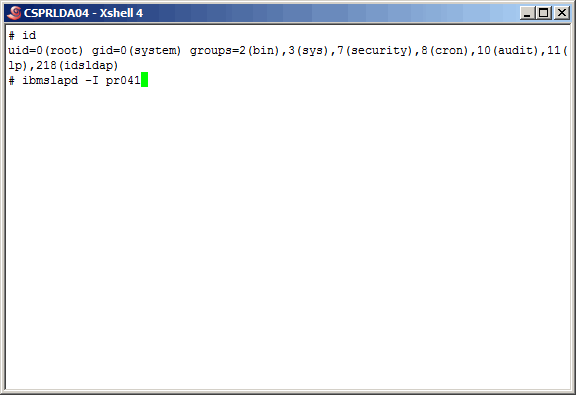
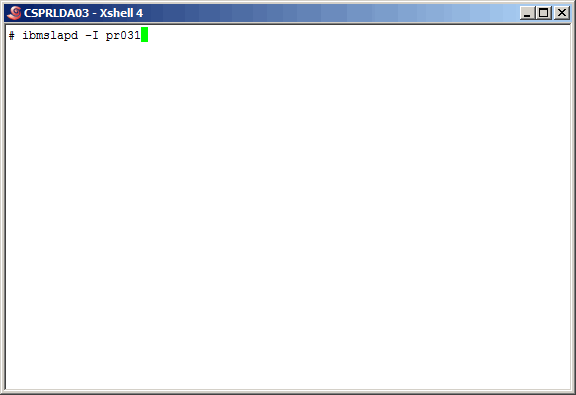
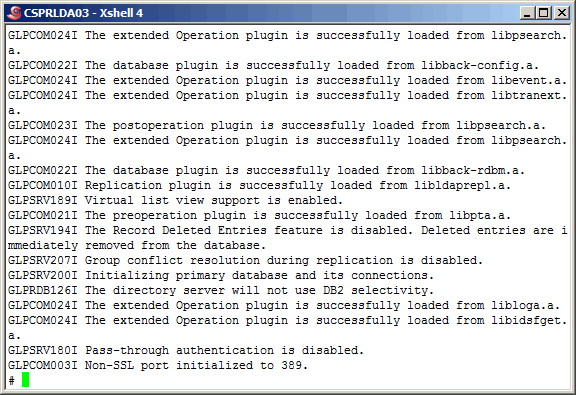
Start the LDAP instance.
Command(s)
|
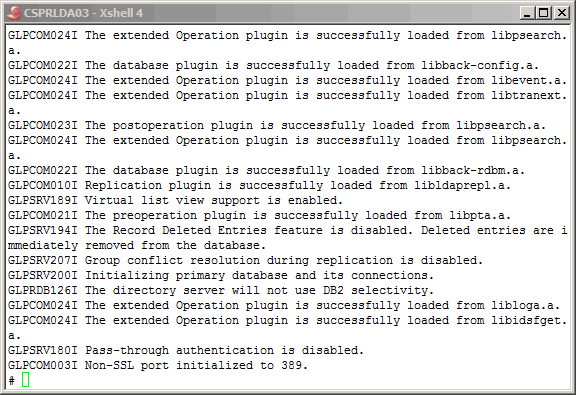
More output from the "ibmslapd" command here.
|
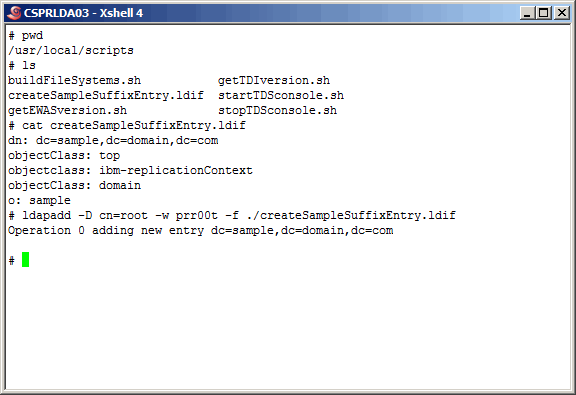
Using
createSampleSuffixEntry.ldif
as input to the "ldapadd" command,
as shown below, create the suffix entry.
Command(s)
|

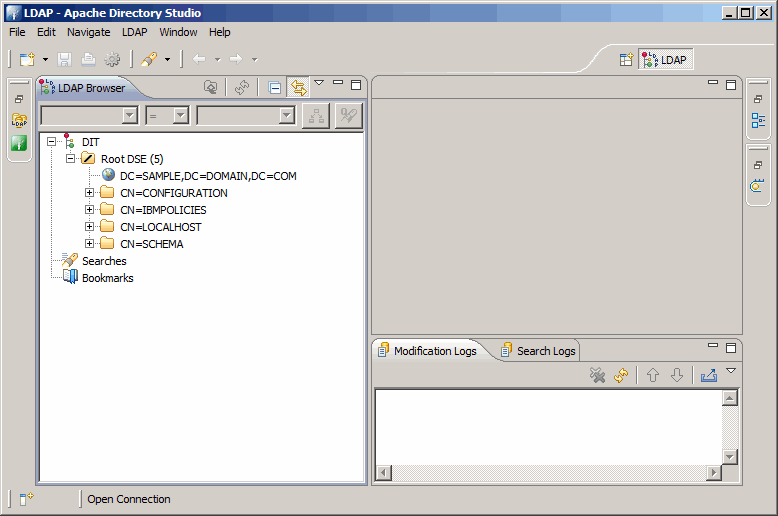
Using either the command line, or an LDAP browser as we do here, test the login
credentials for the instance administrator (cn=root). With this gui, it is easier
to take a look at the entire DIT (Directory Information Tree). Apache Directory
Studio is open source and completely free.
|
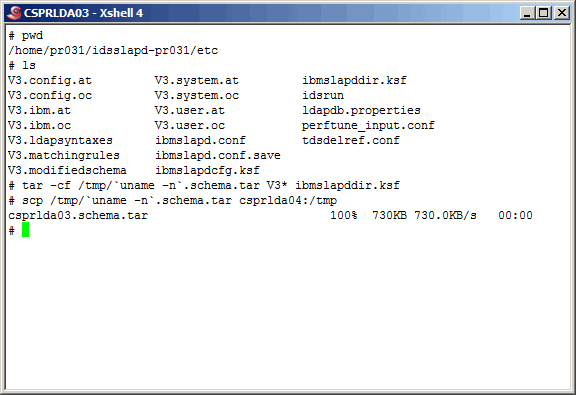
Here we zip up the primary master instance schema files and the keystash file. We
will use these when creating the secondary master. We will use the same encryption seed
"123456789012345" and the keystash to sync the salt values. While this is not absolutely
required for replication, it does lessen the load of replica.
Command(s)
|
Configure Secondary TDS Instance
Unlike the other "Secondary" sections of this article, this one will be a little
more than just a "ditto" of the "Primary". Most of it is the same, but pay close attention
towards the middle of the section. Let's start by setting up the UNIX user account as shown
Command(s)
|
Again, use the "idsicrt" command to create the LDAP instance.
Command(s)
|
More command output......
|
Here is where we deviate a bit from when we created the primary LDAP instance. When creating
a replica, there are two things you want to do. One is to make sure the schema's are identical.
Therefore we use the same set of V3* files from the primary master. The second thing, although
not required, is to use the same keystash file. Using the same seed/salt values for encryption
helps in two ways. One, it allows the replicas to work more efficiently and two, if we have
to perform exports/imports or some other administration functions, we do not have to worry about
encryption/decryption.
Recall that earlier we archived the schema and keystash files from the primary master, and
using scp we copied the archive to /tmp on the secondary master. Before we get to that we want
to move the current V3* and keystash file on the secondary master as shown here. Later we can
delete the "backups" subdirectory.
Command(s)
|
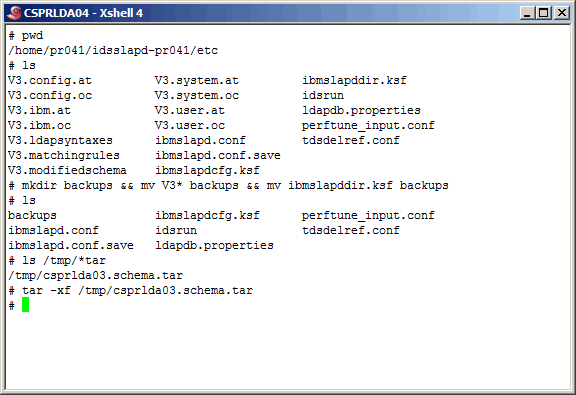
Now, explode the archive from /tmp into the current directory as shown.
Command(s)
|
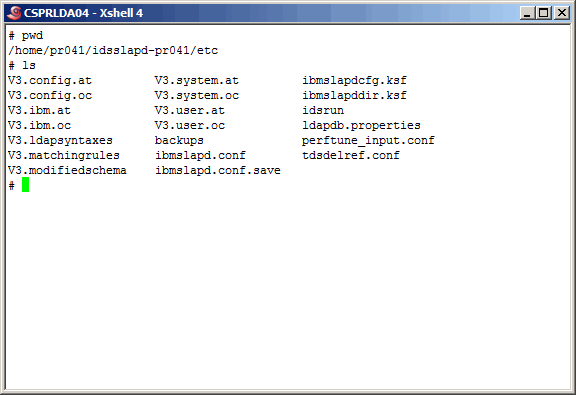
When complete, the directory should be populated as shown here.
Command(s)
|
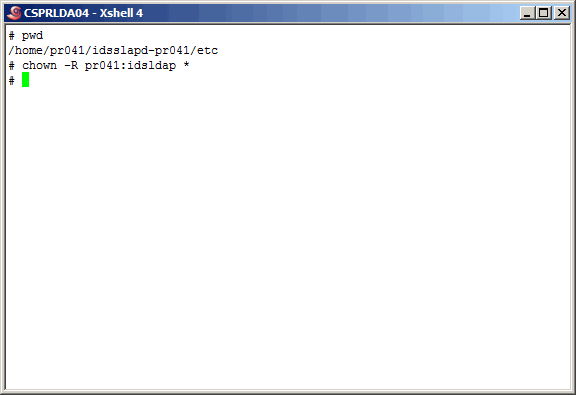
Change the ownership of all these files to "pr041:idsldap".
Command(s)
|
Create the instance database.
Command(s)
|
Create the secondary instance administrator account and set the password.
Command(s)
|
Create the suffix "dc=sample,dc=domain,dc=com" using the "idscfgsuf" command.
Command(s)
|
Start the LDAP instance.
Command(s)
|

More output.......
|
Create the suffix entry.
Command(s)
|
Verify with an LDAP directory browser.
|
Replication - Configure & Test
This section will be a combination of a very well written section
of IBM's TDS 6.3 documentation and some good UNIX skills. IBM's
explanation of configuring replication from the command line is
quite good, however in their example they use two peer-to-peer
replicas and three or four "consumers" as well. Our example here
will simplify things a bit. If you want a more complete example of
configuring replication from the UNIX command line, please reference
IBM's documentation; it is quite well written. During this section we
will make use of ssh key based authentication, allowing us to work entirely
from the primary master server (csprlda03), performing tasks remotely
on the secondary master (csprlda04).
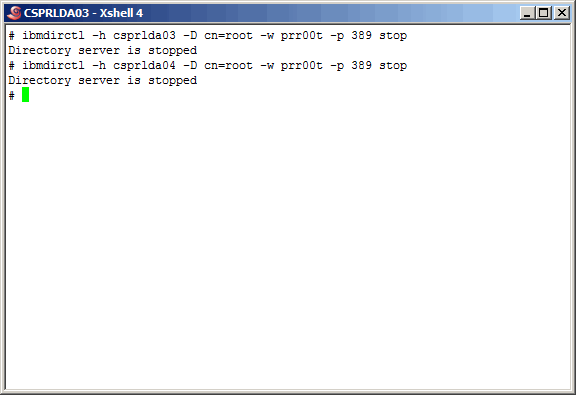
We will begin by stopping both ldap instances, as shown here.
Command(s)
|
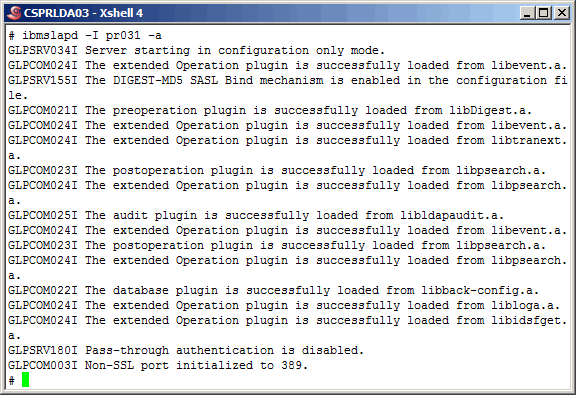
Now, start the primary master instance in "configuration" mode. If you
want to know more about this mode, plese consult IBM's documentation for a
complete description. Briefly, this mode is self explanatory, as we can
configure the instance only; access to all other data is simply not
available.
Command(s)
|
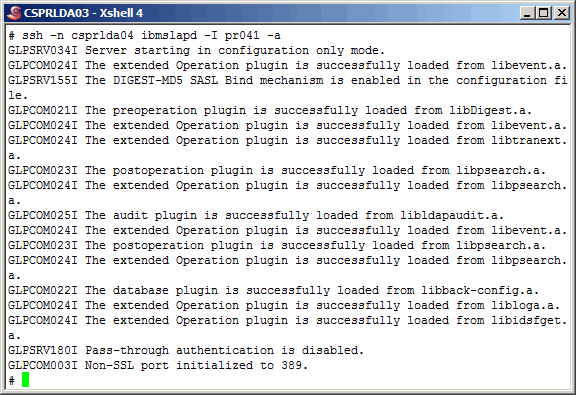
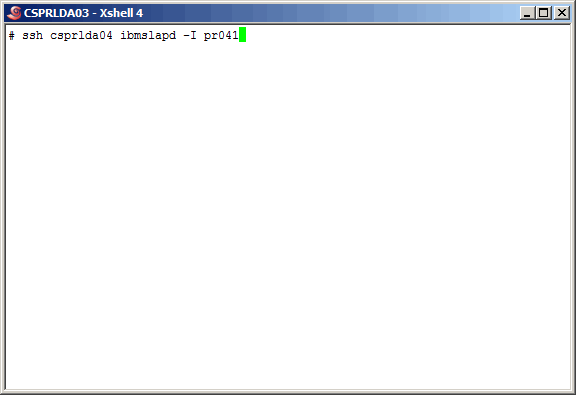
Also, start the secondary master instance in "configuration" mode.
Command(s)
|
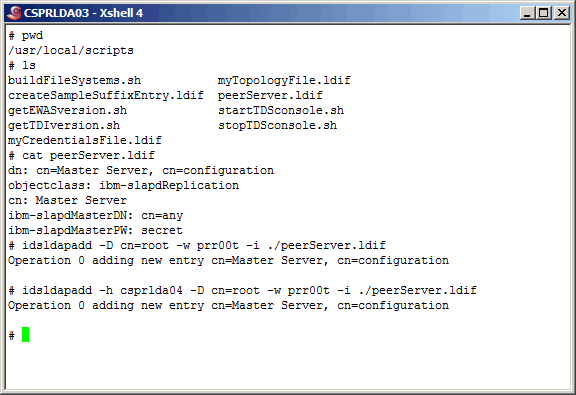
Create
peerServer.ldif
as shown here and use it as input to the "idsldapadd" command as shown here.
This defines both
instances as "peer" or "master" servers. You may want to use different credentials,
however these will work fine for us.
Command(s)
|

Stop both ldap instances, through the TDS administration daemon. The "ibmslapd"
command could also be used.
Command(s)
|
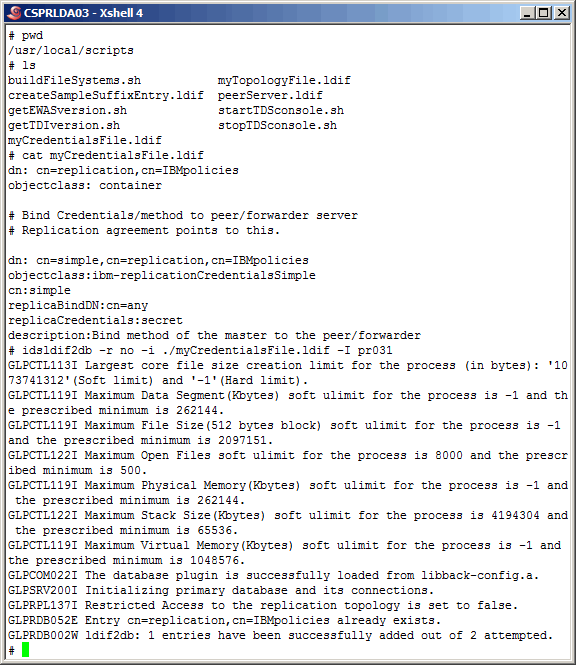
All replication between servers, whether it is peer-to-peer or
supplier to consumer is controlled by an "agreement". Here we have created
the file
myCredentialsFile.ldif
that contains authentication information needed
by any other server to perform replication activities on a particular
server. Using the "idsldif2db" command, create these objects in the primary
master instance. Using the "idsldif2db" cannot be performed if the instance
is using the database; this explains why we stopped the instances.
Command(s)
|
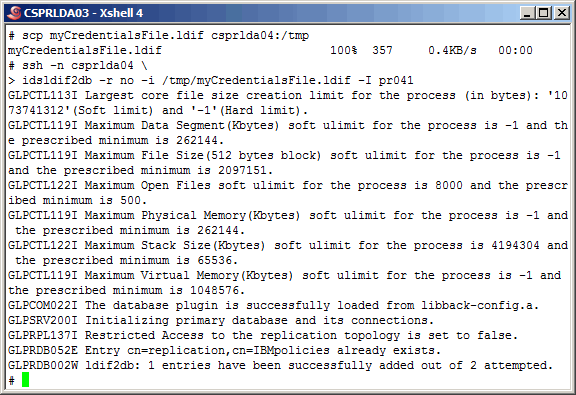
Copy (scp) the ldif to the secondary master and (via ssh) perform
the same action on the secondary master.
Command(s)
|
The final configuration step in replication is to define the
topology. Think of the topology as the detailed information about
what is being replicated to to/from whom it is being replicated.
Topology information required for ldap instances to communicate
is confined to the server FQDN (Fully Qualified Domain Name), port
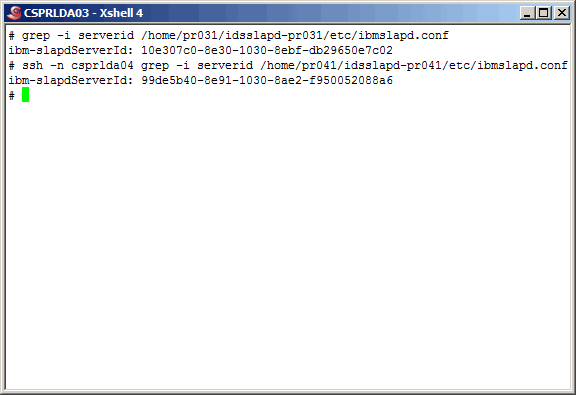
number, and the ldap parameter "ibm-slapdServerId". The server id
is found in the ldap instance configuration file "ibmslapd.conf". Here
we fetch that information for both master servers.
Command(s)
|
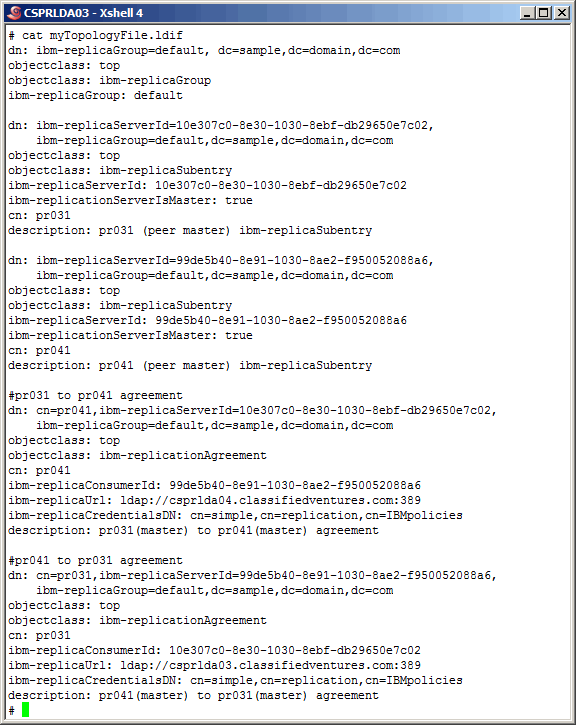
Here is the
topology
we will use for this article. The topology ldif
is added to every ldap server within the topology. This information is fairly
sel-explanatory; see IBM's documentation for more detailed information.
Command(s)
|
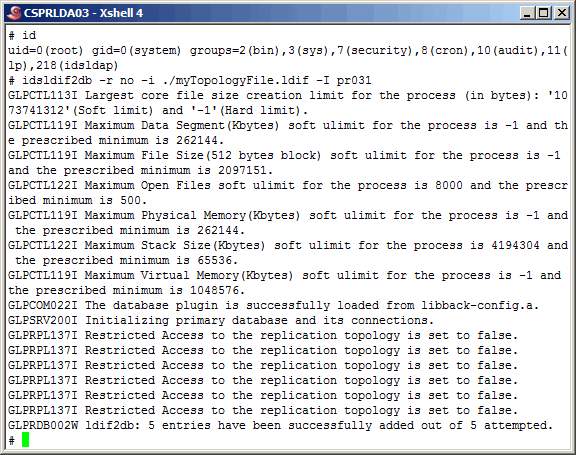
Using "idsldif2db" populate the primary master server instance/database
with the topology.
Command(s)
|
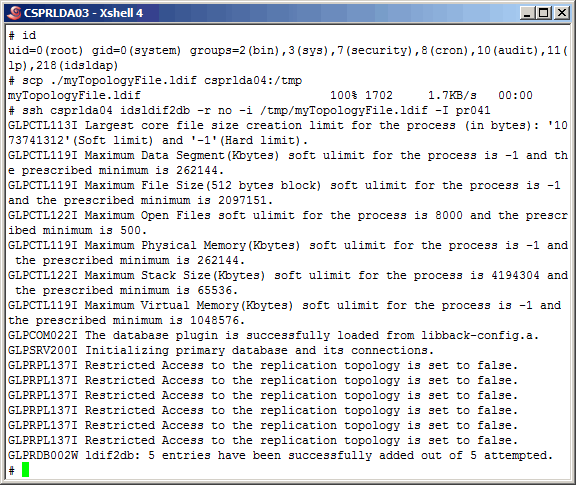
Using scp/ssh copy the topology data to the secondary master, and populate the
secondary master server instance/database.
Command(s)
|
We are ready to perform some command-line testing at this point. Start
the primary master ldap instance.
Command(s)
|
More output........
|
Now start the secondary master server ldap instance.
Command(s)
|

More output......
|
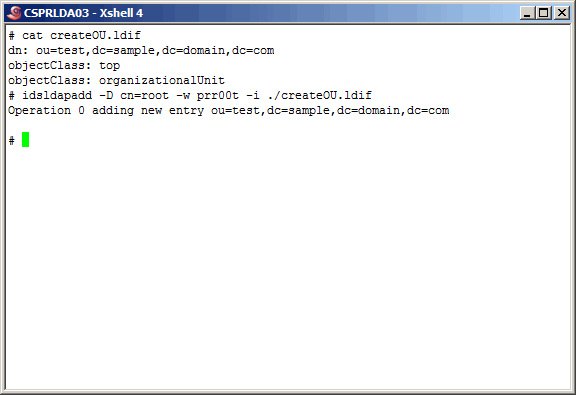
Now, using
createOU.ldif
as input for the "idsldapadd" command create an object in the primary master.
Command(s)
|
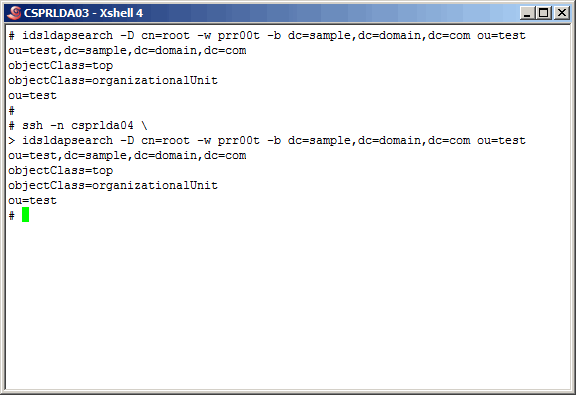
Check for the creation (replication) in the secondary master. And "bingo",
it was indeed created. This is a simple test of one-way replication.
Command(s)
|
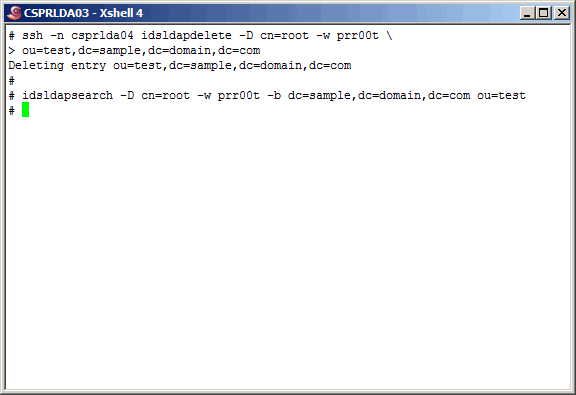
Here, we delete the new object on the secondary master, and verify that replication
is bi-directional as the object is now gone on the primary master as well. Replication
has now been set up as a master-master agreement. Of course, to be thorough about
anything, you should probably check the ibmslapd.log file as well. We did, and
found no errors.
Command(s)
|
|
Web dministration Tool
In this section of this article, we will configure the "IBM Tivoli
Directory Server Web Administration Tool". This tool is very handy, at
times, to have around. Along with helping non-hardened LDAP veterans
admininister LDAP, IBM will sometimes want us to use it when helping
diagnose a problem.
|
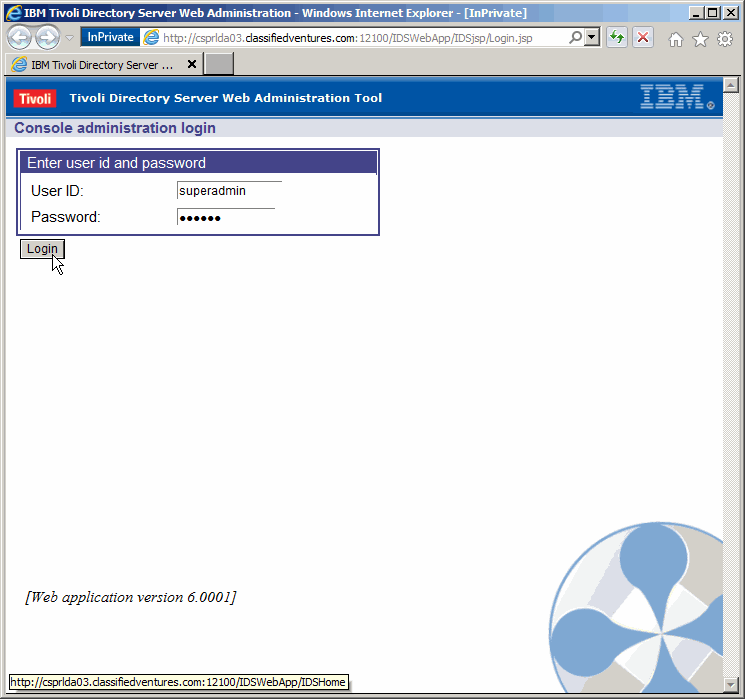
Log in using the default credentials superadmin/secret.
|
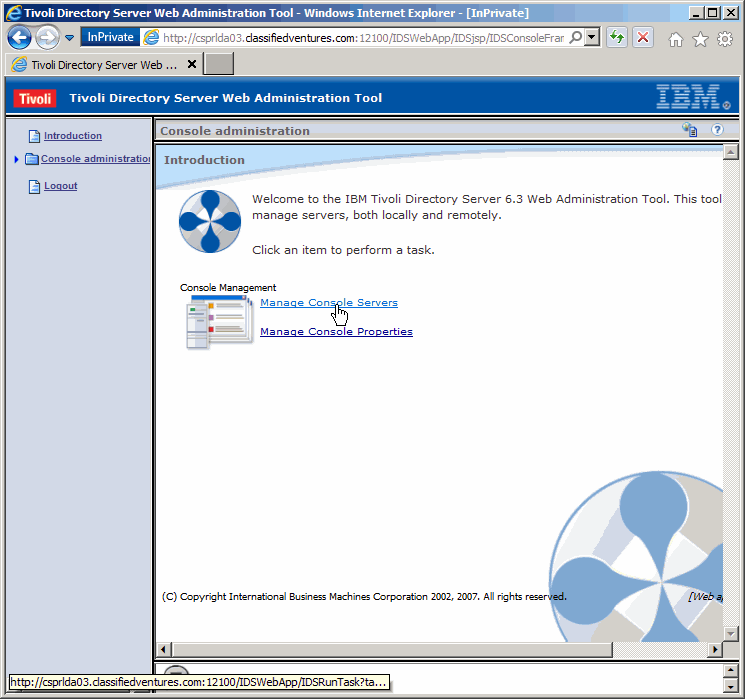
We must define the LDAP instances we want to manage. Click as shown here.
|
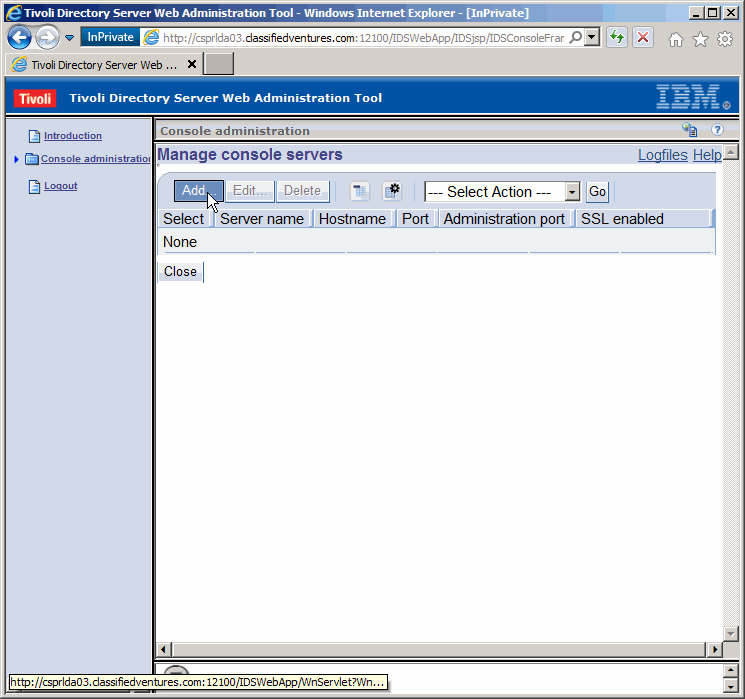
Add a console server. Click as shown.
|
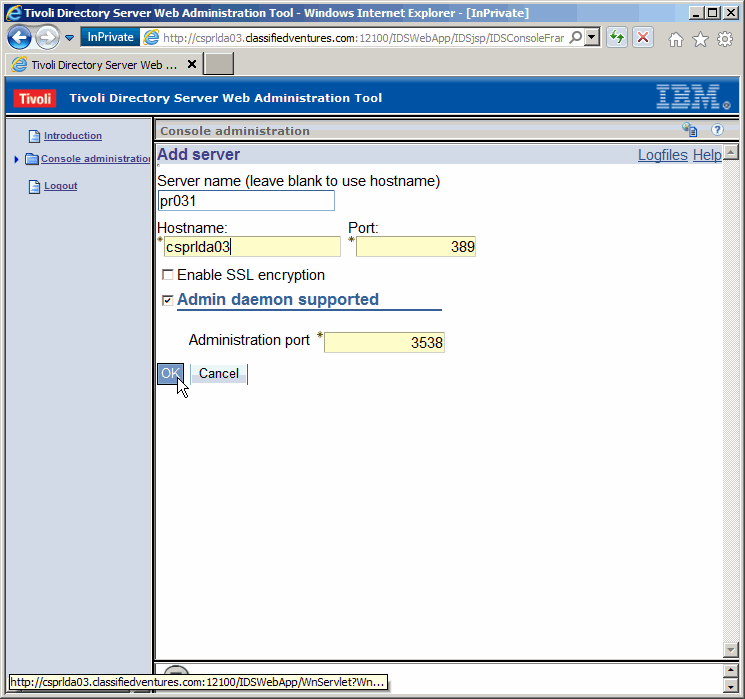
Fill in, something like we did here. I would suggect however to always
use the server FQDN as opposed to the "short name". Click on "OK" to save the
change.
|

Success. Click as shown.
|
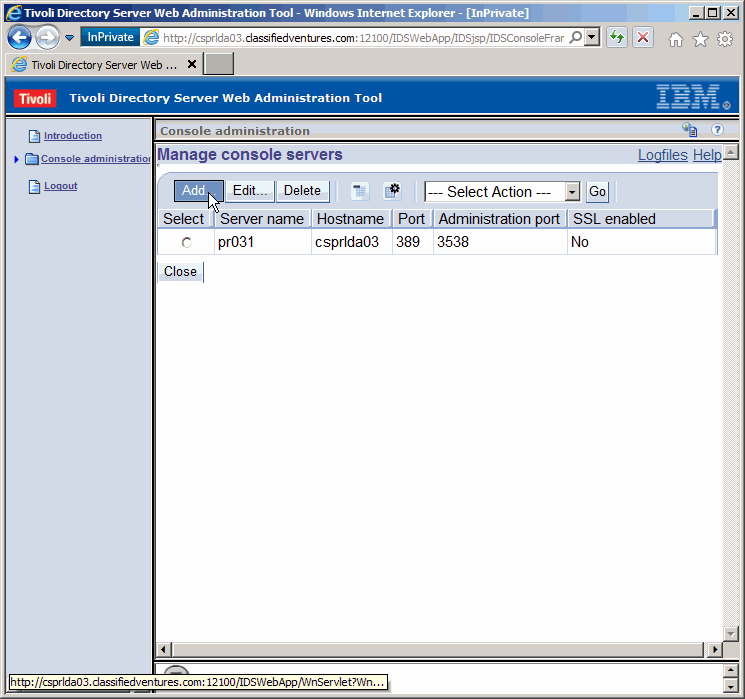
As we stated prior, we can remotely manage LDAP instances as well. Let's
remotely manage the secondary master instance from the primary master by
performing another "Add".
|

Again, the FQDN should have been used here. Shame on us. :)
|
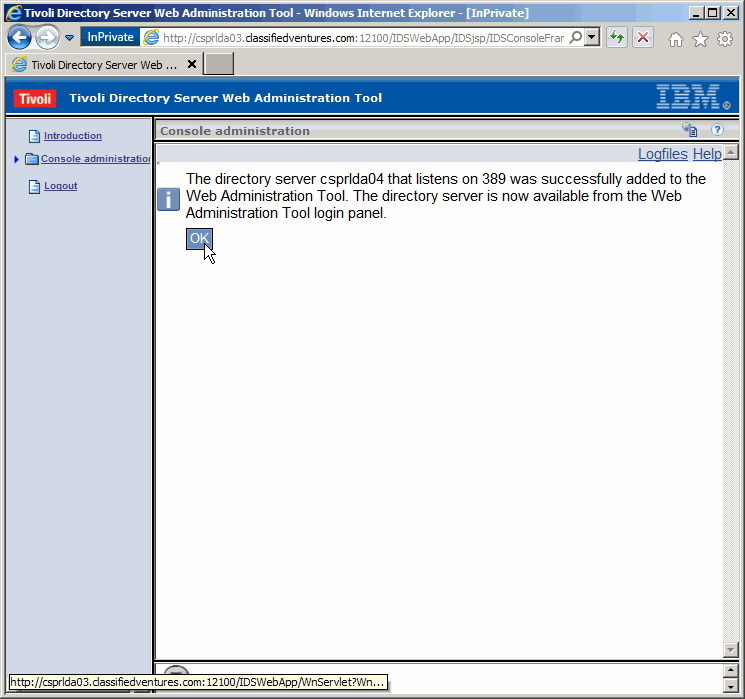
Again, success.
|
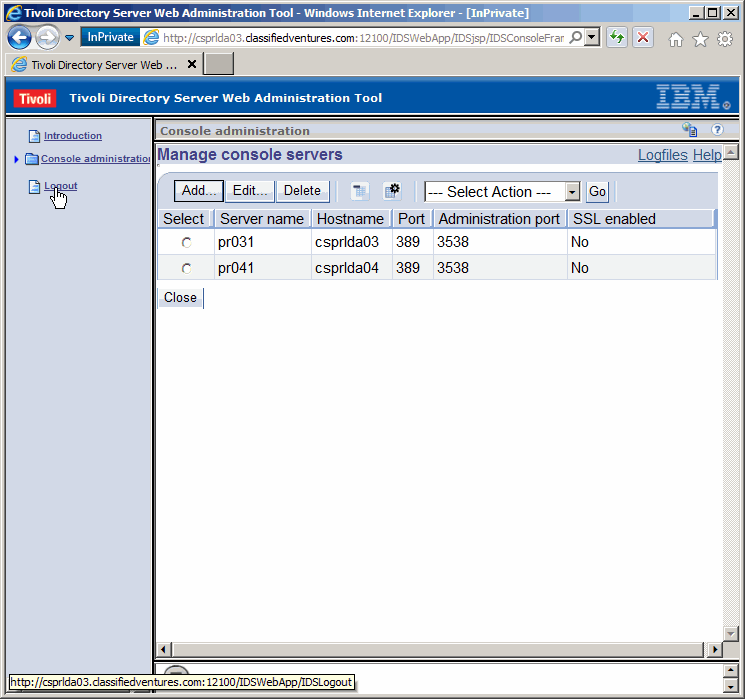
Now we see both instance console servers have been added. We need to logout
before we can manage either.
|

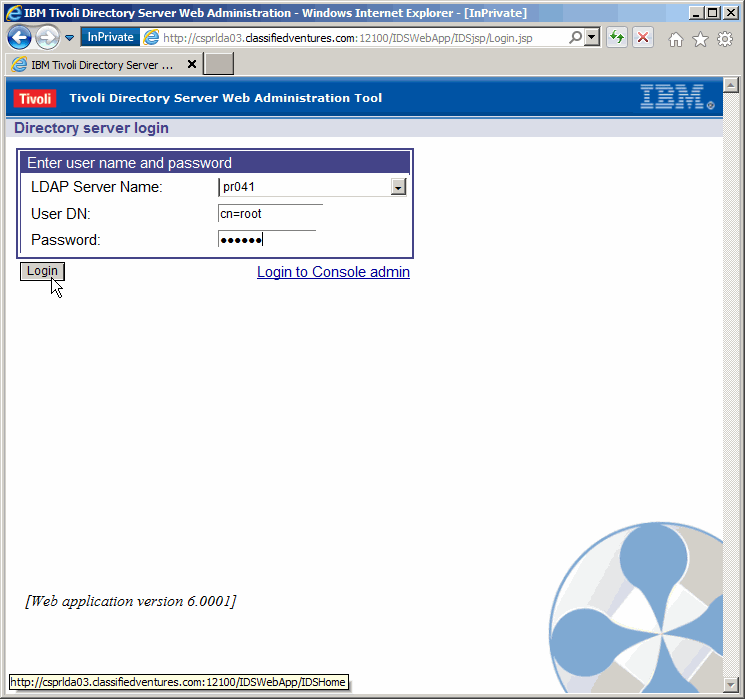
This will take us where we want to be.....
|
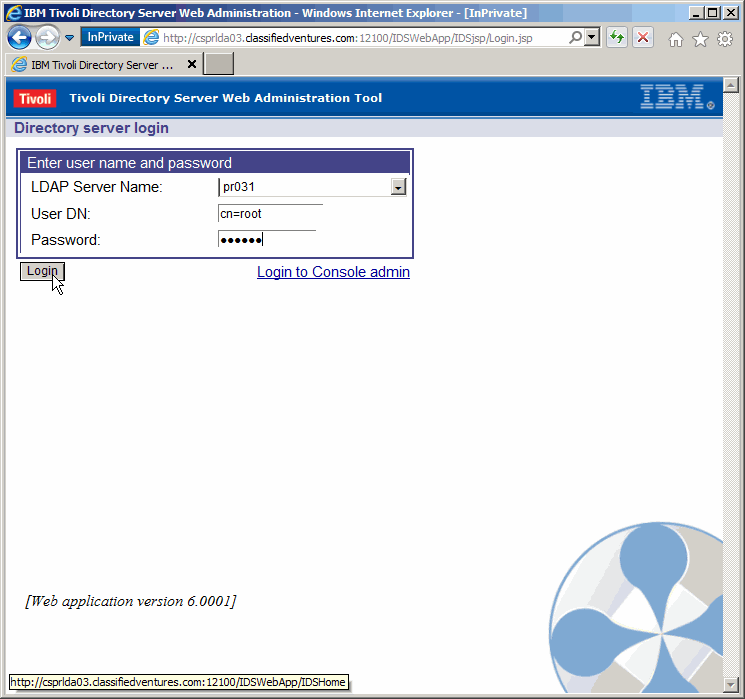
Log in to the primary master, using cn=root/prr00t.
|
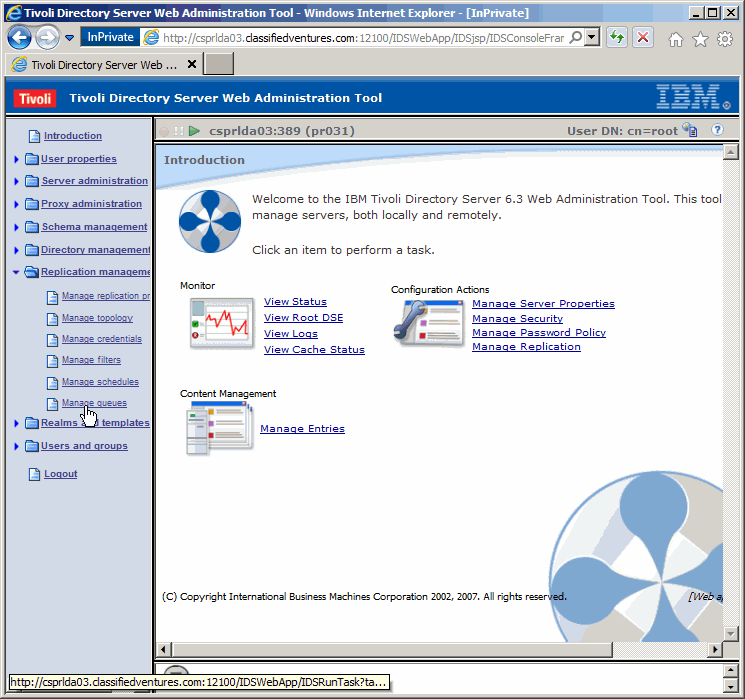
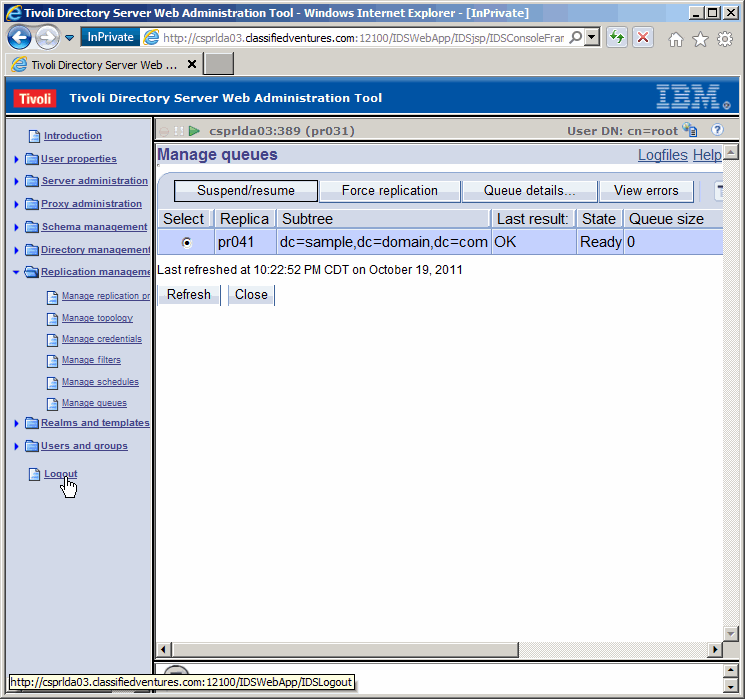
Exapand "Replication management" in the navigation pane and click on
"Manage queues". We will take a quick peek at replication.
|
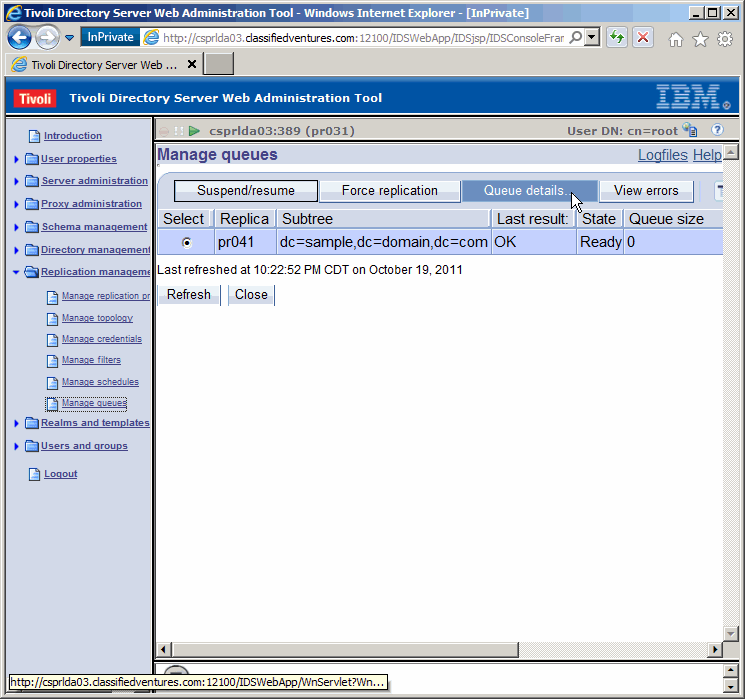
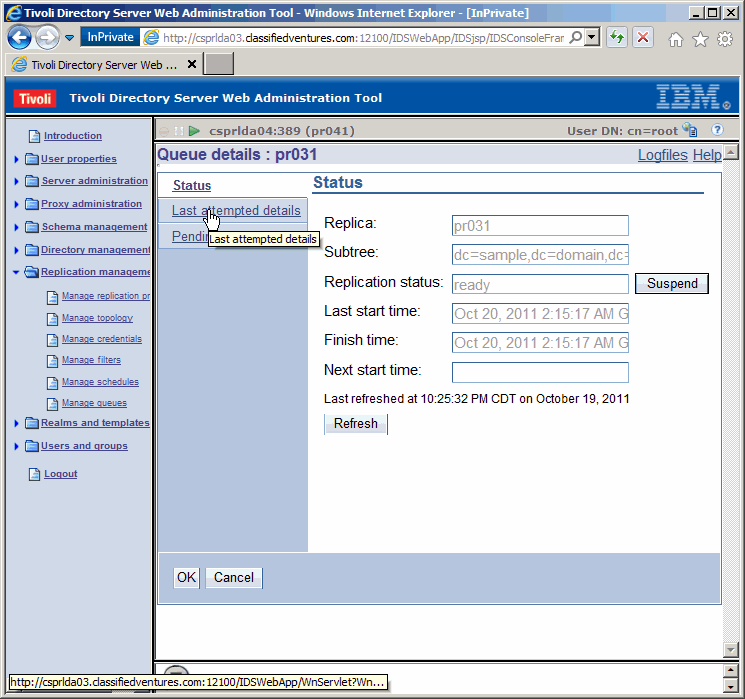
Last result: OK, State Ready, and Queue size 0, is all good news. Now
let's take a look at the queue details.
|
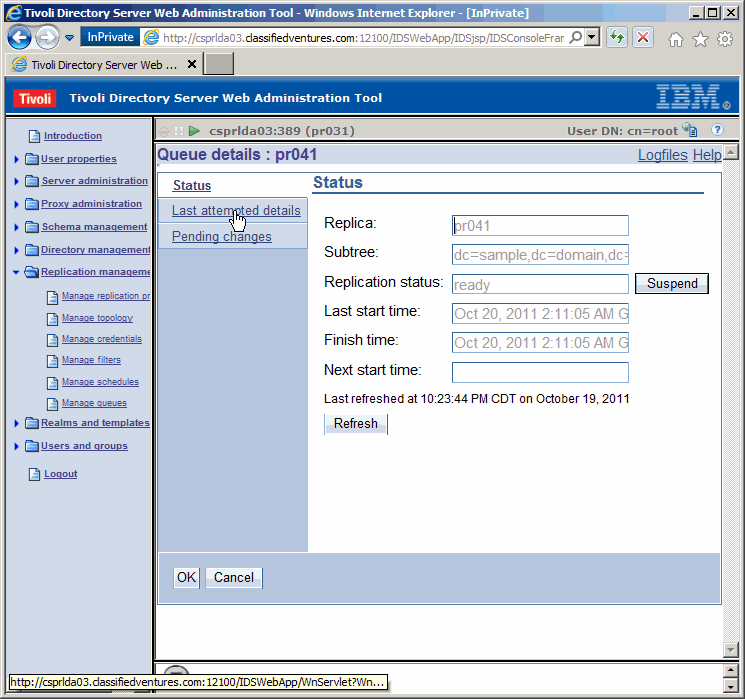
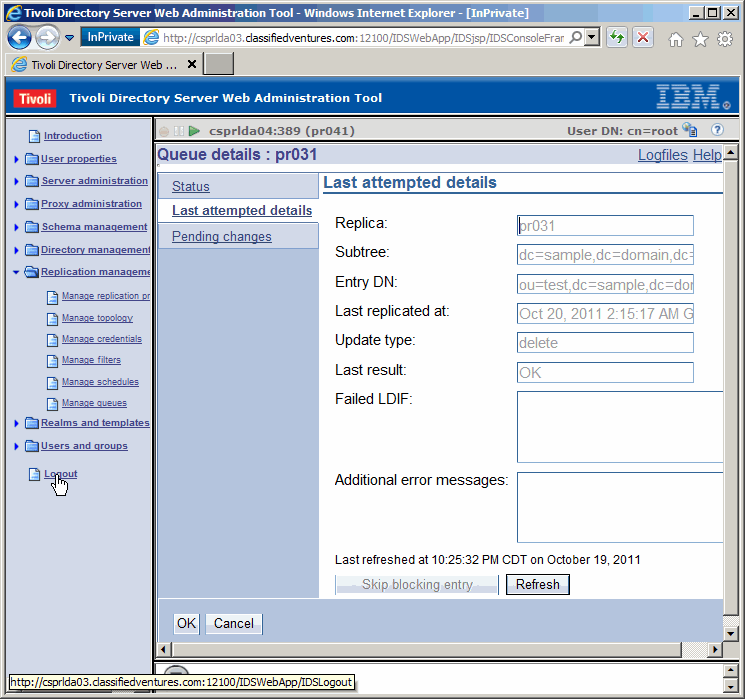
Let's see the details of the last replication transaction.
|

Here we see the add operation we made on the primary, being done to the secondary.
|
Logout of the primary master console server.
|
Login to the secondary master console server.
|
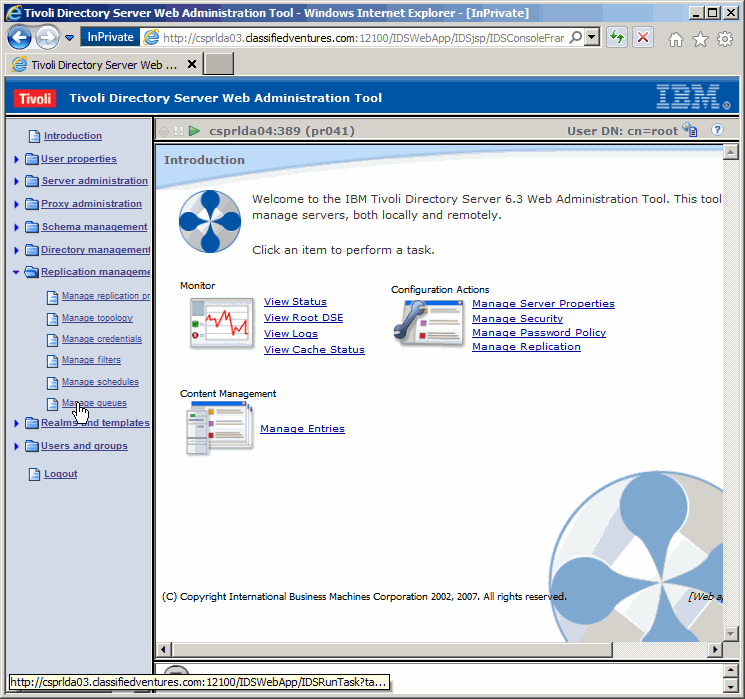
Let's get to the replication queues again.
|

Again looking good; now to the queue details.....
|
And further to the last replication detail.....
|
Good. Here we see the delete being replicated back to the primary
master.
|
|
Data Migration
In the final section of this article, we feel the need to mention
data migration, as we mentioned at the beginning of this article. We will
not be going through any examples, however we will mention a "lesson
learned".
|
|
Conclusion
We have now concluded this article. Our intent was to show you the A-Z's of
TDS 6.3 LDAP Replication, with some good solid UNIX techniques mixed in. To
recap, we demonstrated TDS installation, configuration, integration, and
administration. After this all you need to do is take care of backups and
monitoring and hopefully you won't have to worry about your LDAP environment.
Did I mention tuning?
|
|
Printing
As it turns out, as we are busy working on the HTML/CSS/php/Java Script formatting of our articles,
pretty printing is not yet possible. We are working on it at a low priority.
|