|
Tivoli: Synchronizing Active Directory & TDS 6.1 With TDI 6.1.1 - Part I
(c) brokenribgolfer.com Author: Mark Hopkins Email Date: 03.12.2008 In our second in what will most certainly be many articles using Tivoli Directory Integrator (TDI), we begin a four part series on directory server synchronization. We are going to synchronize Microsoft Active Directory objects with Tivoli Directory Server 6.1. We feel it best to break this process up into four parts simply because of the vast amount of material and concepts covered. As of now, the plan is to break up the whole into the following parts:
Article Index
Wouldn't life be much easier if all LDAP servers used the same schema and schema naming conventions? The answer to that question is a resounding "YES", but then would we have the need for such a neat tool like Tivoli Directory Integrator? If all schemas were the same, all we would need to do would be replication, or would it? The fact is that replication could not do what we can do with TDI, because with TDI we can perform, in essence, selective replication. So, we have a need to perform such a partial replication and this article will cover steps to do just that. Assumptions / Requirements
As always, we believe that our articles are so complete, that a monkey could follow them to duplicate our
efforts, however we realize that a certain amount of expertise is required. Actually, a monkey probably would
not be surfing the web looking for articles like this one. We are going to assume that you have a solid understanding
of LDAP, Active Directory, Tivoli Directry Server, Tivoli Directory Integrator and UNIX. We also hope that you
have patience with us in the event that we attempt to inject some levity into our experiences.
|
|
Procedure
Now that we have laid the groundwork, let's get going with the actual steps. |
|
Configure The Active Directory Read Connector |
|
Start TDI, and we see the splash screen as shown.
|
|
|
|
Here we will create a new project configuration.
|
|
|
|
We call our project SyncDirectoryServers. Click OK to continue.
|
|
|
|
Now let's create a connector to read from Active Directory.
|
|
|
|
Choose the appropriate connector type. In our case that type is ibmdi.LDAP. Also select
Iterator mode as we will be continuously reading. We name the connector Read.Active.Directory.
Click OK to continue.
|
|
|
|
As we are trying to keep the IDE screen small to fit our web browser, let's hide the left panel for
now by clicking the Show/Hide the Config Browser button as shown.
|
|
|
|
As seen here, we now have a better view.
|
|
|
|
Fill in all appropriate information for Active Directory authentication. Notice that we are
using the domain administrator account in our exercise. You may want to create a special account
for this, as we will be doing in a follow-up article. However, beware that if you want to use
the Active Directory Changelog connector, as we will later, the bind account must have certain
privileges to detect "deletes". We will cover this in the next article.
|
|
|
|
We want to load objects from the suffix shown; you may want to choose something different. Click OK to continue.
|
|
|
|
As shown, our input screen is now complete.
|
|
|
|
Ever heard the phrase "save often"? Well, we recommend it here as well. So, as shown, click
Save selected configuration.
|
|
|
|
On the Input Map tab, let's instruct TDI what attributes we want to retreive from Active Directory.
Click the Add a new attribute to the Attribute Map button as shown.
|
|
|
|
Select all attributes by entering a "*" in the dialog box. Click OK to continue.
|
|
|
|
Let's begin a manual read test from the input source (AD) by first clicking the Connect
to the data source button.
|
|
|
|
Next click the Read the next entry button to read a single object.
|
|
|
|
Success! If all is well, you will see the first oblject as we do here.
|
|
|
|
Let's quit for now; we are getting tired.
|
|
|
|
If prompted to save the current configuration(s), click Yes to do so.
|
|
|
|
Modify The Tivoli Directory Server Schema |
|
Now we start getting into some "nitty, gritty" detail as we must modify the TDS 6.1 schema for our
"test" directory instance. Here is where we are going to assume that you understand the need for unique "link
criteria". In a nutshell, we will be adding and updating objects form Active Directory to Tivoli
Directory Server. To ensure that we do not add objects that already exist, and to ensure that updates
are successful, we need a unique attribute that links the object from AD to TDS. This attribute must
be one that cannot be changed. In our case the AD attrbute is called the "objectGUID". To make things
more complicated, the "objectGUID" is a binary value, and TDI canot link based on this data type. So
we must convert it to a string value and store that value in all TDS objects. TDS version 6.1 seems
to be a little "ahead of the game" and already has such a defined string attribute for us named
"adObjectGUIDStr". However, this attribute is not mapped to any object classes that we can see. So,
if we want to use it, we must first map it the our object classes. We are going to map it as an "optional"
atribute in this article, however you very well might want to make it "required" as it really is required.
So, here we are going to map the attribute to the following object classes:
There are at least two ways to modify the instance schema in TDS. One is the web admin interface, and the other is the command line. We will cover them both in this article. For one or two changes, we might use the web interface, but for many changes we recommend using the command line. We pretty much always use the command line. Before we begin, let's log into the TDS server and start up the "test" instance and the web-based administrator interface. In the following screen, we assume that the instance is down, and we will start it here. If it is already up and running, this command will fail without doint any harm. |
|
|
|
A successful instance startup will yield the following. The next command is to start the Web Admin
Application Server.
|
|
|
|
And once again, if successful, you will see the following:
|
|
|
|
Web Based Administrator Interface |
|
To perform schema modification from the web interface, log on as shown here.
|
|
|
|
On the left panel, drill down to Schema management and Manage object classes.
Then, also as shown, on the right panel, tell the interface to make the "find toolbar" available
so that we can search for an object class.
|
|
|
|
Click Go to make the toolbar appear. A note here for IBM: MAKE THE TOOLBAR VISIBLE
BY DEFAULT!!!!!
|
|
|
|
Now let's search for one of the object classes that we want to modify, "organizationalUnit". Click
the Find button.
|
|
|
|
Once the object class is found, scroll down to verify.
|
|
|
|
Then scroll back up, and click the Edit button to edit the object class.
|
|
|
|
On the left panel, dril down to Attibutes. Under Available attributes select the attribute
that we want to apply to the object class. This is adObjectGUIDStr for us. Then click the button
Add to optional
|
|
|
|
Now commit the change by clicking on the OK button.
|
|
|
|
If you do not get an error here, the modify was successful, as is the case here.
|
|
|
|
Expand the left panel and Logout.
|
|
|
|
We can kill the browser session now.
|
|
|
|
Command Line |
|
Now let's see how easy it is to make schema modifications from the UNIX command line. So, log
into the TDS server host. When modifying an LDAP object in TDS, we must get the current ascii
representation of that object and modify it carefully, before using it in an ldapmodify command.
Definitions for all objects can be found in:
|
|
|
|
Here is what the file looks like prior to our changes.
|
|
|
|
Mofify the file as shown here. Notice we preceed the output with the following:
|
|
|
|
Now, to make the change, execute the following command:
|
|
|
|
The following screen represents all of the object class changes that we actually made to the schema.
|
|
|
|
Create The Instance Suffix
Before we can begin mapping objects from Active Directory to our Tivoli Directory Server
(TDS) instance, we must create a suffix on the target directory. This can be done from either
the web admin interface, or the command line. We will show the later. To do this we shutdown the
instance, create the suffix, and then start the instance. If we were to use the web interface,
we would not have to stop the instance. This makes no sense to us, so if you have questions, feel
free to ask IBM. Let's now log into the server.
|
|
|
|
Suffix created.
|
|
|
|
Restart the LDAP instance.
|
|
|
|
Successful startup will yield the following.
|
|
|
|
Add The Suffix Entry
An entry must now be added for the newly created suffix. Create an ldif file as shown below.
It should contain the following information:
|
|
|
|
Create A "Dummy" Object
I find this next necessity a little weird, and IBM TDI technical support was of little
help; perhaps justifiably so. Consider that we have created a new suffix on TDS. Also consider
that there are no objects under it. So, when we connect via TDI and try to map attributes, we
will come up empty. Now, there might be a better way to resolve this issue, and if you have one
please drop me a line. But as far as my thinking takes me, we need to create a dummy object with
all of the attributes that we want to map. So we created another ldif file with the following
entries:
|
|
dn: cn=testUser,dc=test,dc=com objectClass: inetOrgPerson objectClass: top objectClass: person objectClas: organizationalPerson sn: testUser cn: testUser givenName: givenName adObjectGUIDStr: adObjectGUIDStr displayName: displayName description: description mail: mail@test.com |
|
This ldif file now contains all the attributes that interest us. We can now add this oject to our TDS
LDAP instance with the following ldapadd command:
|
|
|
|
Configure (Map) The TDS Update Connector
We can now create, configure and map our outbound connector to TDS. So, "fire up" TDI,
if you haven't already (like us), and let's begin.
|
|
|
|
On the left panel, as shown, create a new conector.
|
|
|
|
Once again the connector type is ibmdi.LDAP. Name it, and put it in Update mode. Then click the OK button to proceed. |
|
|
|
This brings us to a familiar place, the connector configuration menu. Once again, to conserve space,
close the left panel.
|
|
|
|
Complete the configuration screen to your requirements. Modify the "Search Filter" as we have done. Then
query the LDAP server for a suffix list by clicking the Contexts button.
|
|
|
|
Select the target suffix as we have done. Click the OK button to continue.
|
|
|
|
Now the configuration is complete.
|
|
|
|
To continue, click the Output Map tab.
|
|
|
|
First, let's connect to the data source, as shown.
|
|
|
|
Now read the next (or first) entry, also as shown.
|
|
|
|
Notice that the first entry is the domain object. Read the next entry.
|
|
|
|
Now, we are where we want to be, with the "testUser" object in fron of us. So, drag and
drop the desired attributes from the right panel, to the left panel. We do not show this process,
only the result. This is another good time to save our work.
|
|
|
|
Build The Assembly Line
Now it is time to build an assembly line. Start TDI, if you are not already using it, and
open our project. In the left panel, right click on Assembly Lines. Select New
Assembly Line.
|
|
|
|
Give your new assembly line a name, as we have done here.
|
|
|
|
This brings us to the following screen.
|
|
|
|
In TDI 6.1.1, assembly lines consist of two main parts: Feeds and Flows. For the most part a feed
refers to input and a flow refers to output. Right click on Feeds to Add Connector Component.
|
|
|
|
Select the user-defined connector to read from active directory. Notice that you can change
the way we initially configured it if we like. However, for now, we leave it as previously
defined.
|
|
|
|
Now Add Connector component to the Flow side of the new assembly line.
|
|
|
|
Select the user-defined connector to update TDS.
|
|
|
|
At this point we might as well allow both "Add" and "Mod" on every attribute. Are we
finished now? Ready to run the assembly line? No, for it would fail. There is more
complexity to come. However, don't frown because there is not much more remaining. This
is another good time to save your work.
|
|
|
|
Mapping Attributes And JavaScript
This article is fast approaching a size limit. Therefore, we are only going to map
the directory structure (OU's). We will save the users and groups for the next article. So as
we read objects form Active Directory, we will check the object class. If it is equal
to organizationalUnit we will copy it to our TDS instance.
|
|
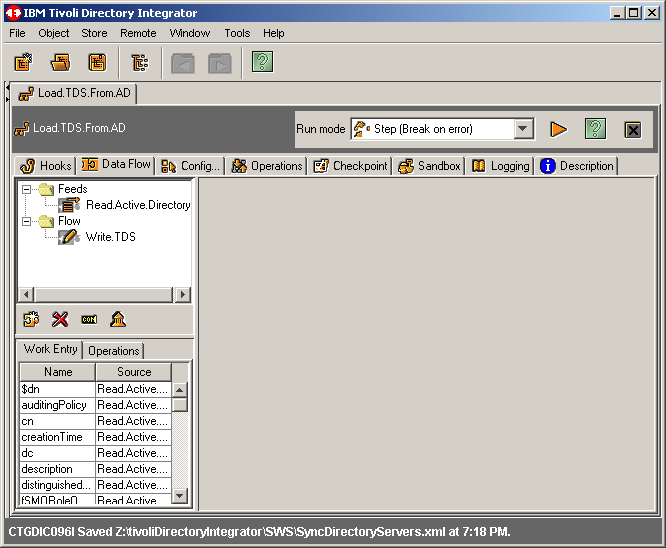
Picking back up where we left off above, notice that we have an assembly line basically configured.
|
|
|
|
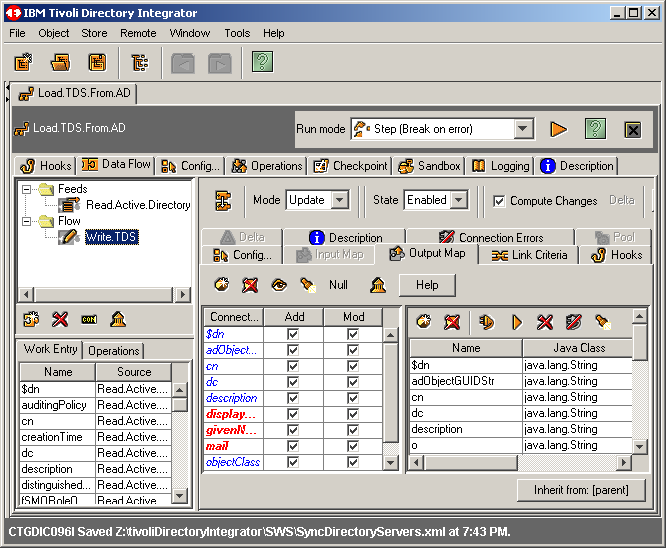
Highlite the Flow conector Write.TDS and let's take a look at our output map.
|
|
|
|
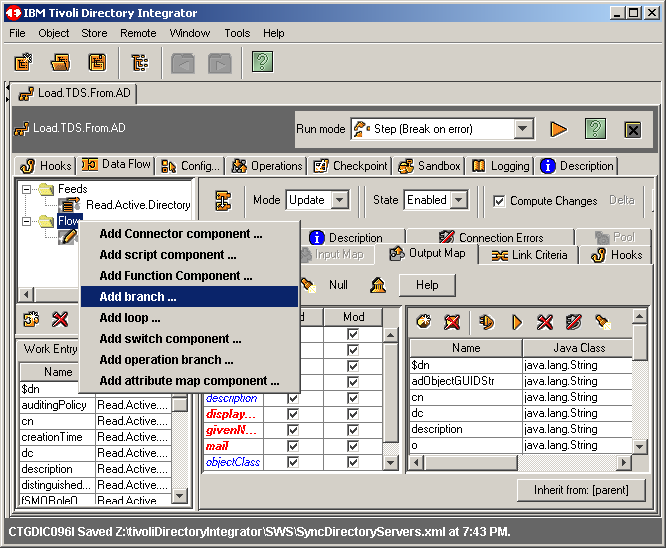
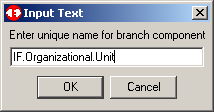
Let's now add some branching logic. Recall that we are going to test for the object
class organizationalUnit. Right click on Flow and select Add Branch ...
as shown here.
|
|
|
|
Name the branch as we have done. Click on OK to continue.
|
|
|
|
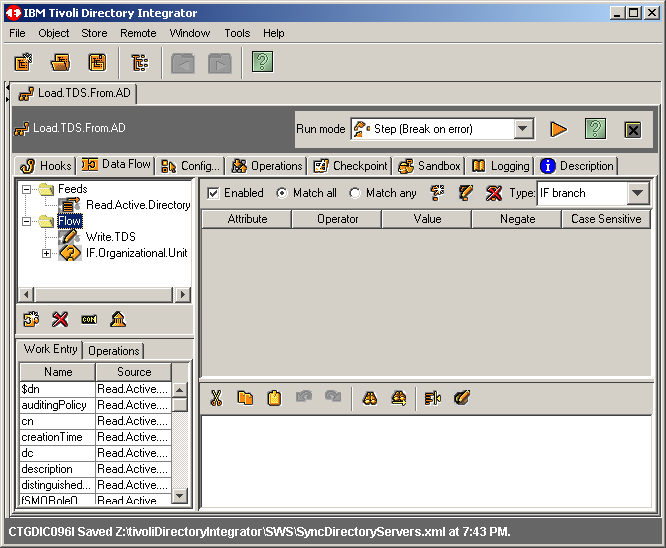
Notice that the IF branch shows up AFTER the action we wish to take. Time to manipulate
things a bit. In this case, simply select the action Write.TDS and drag it atop
of the IF branch. If will then nest itself properly.
|
|
|
|
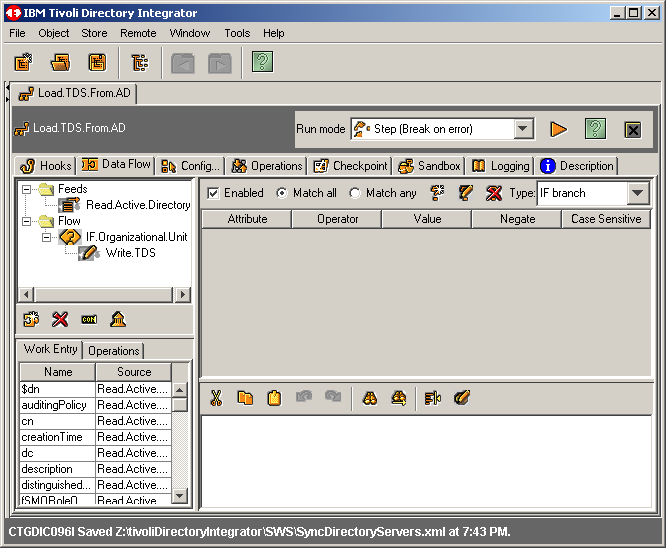
As we see here, the logic flow is ready to be worked.
|
|
|
|
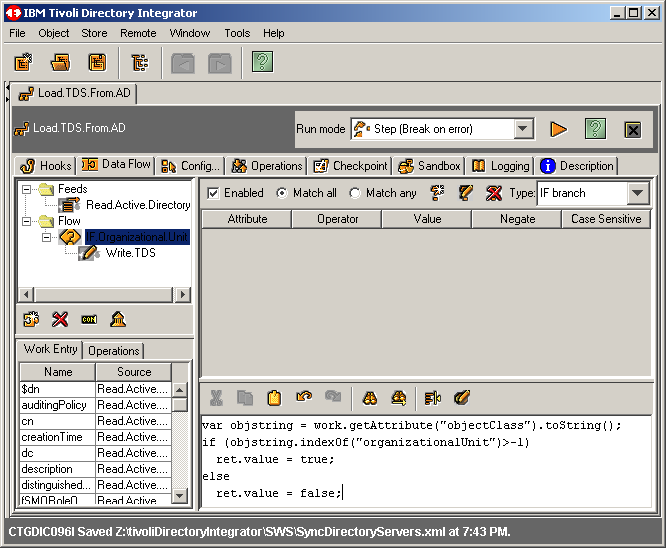
And now, a little JavaScript. All interface engine IDE's have the ability and need for a script language. As for TDI, it's JavaScript of course. Here we want the branch to return TRUE is the examined object has the object class of organizationslUnit. Apply the following code as shown in the screenshot below. |
|
var objstring = work.getAttribute("objectClass").toString(); if (objstring.indexOf("organizationalUnit")>-1) ret.value = true; else ret.value = false; |
|
|
|
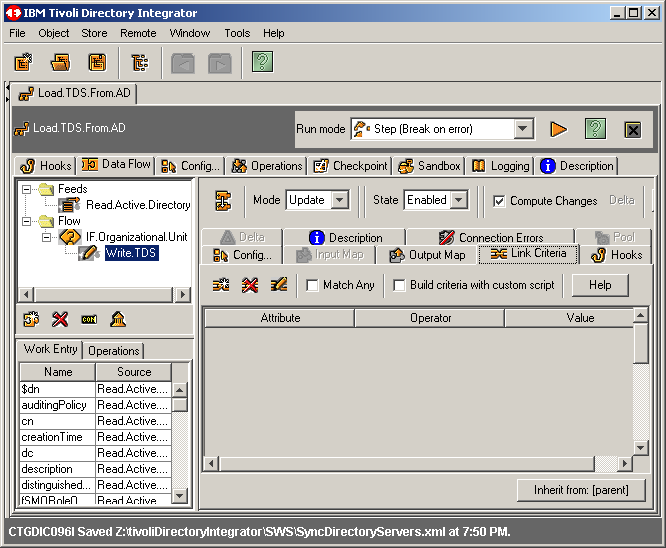
Now highlite the action connection Write.TDS and click the Link Criteria
tab. Next click the Add new link criteria button also.
|
|
|
|
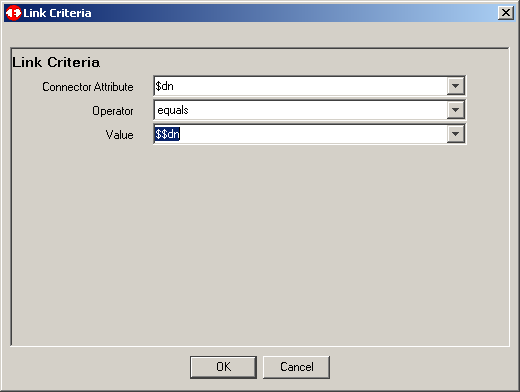
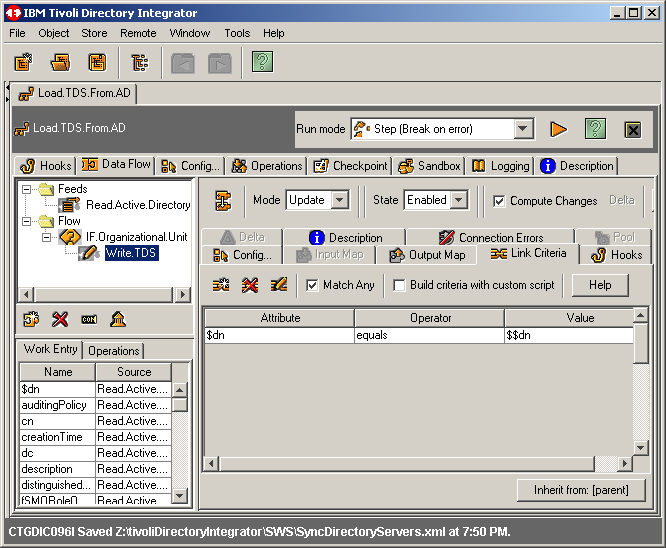
Because this connector is in Update moce, we must define at least one
link criteria. Truth be told, since we are performing an intitial load of objects
from AD to TDS, we could have simply put this connector in Add Only mode
foregoing the need for the link criteria. However....... for now let's use the
DN as our only criteria. We will see in the next article that we will not want
to use an attribute that can be modified, and we will change this criteria to a unique
static attribute. When finished, click OK to continue.
|
|
|
|
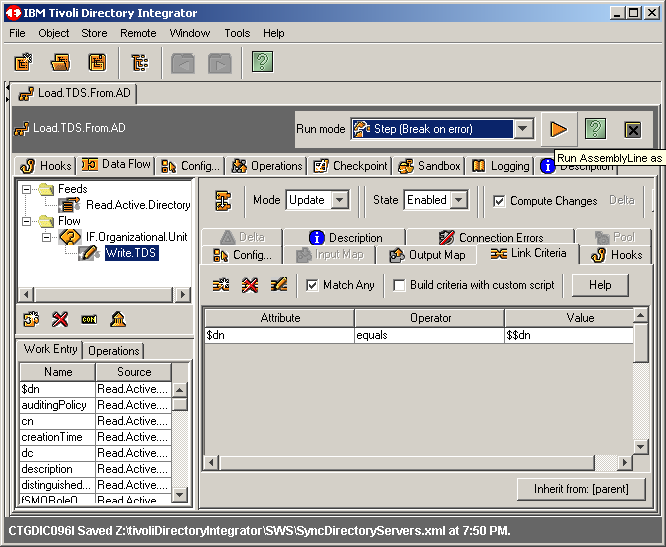
Before saving our work, we make certain to click/activate the Match Any
button as shown. Then we save our work.
|
|
|
|
Running The Assembly Line
We can now run the assembly line. Click on the gold right arrow as shown
here.
|
|
|
|
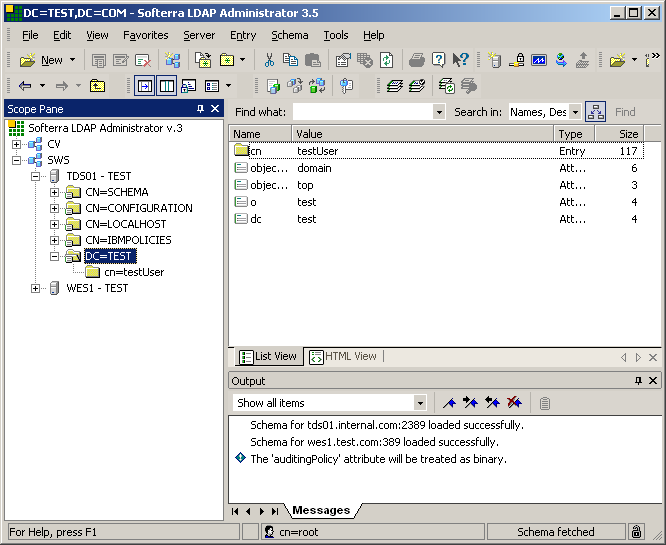
Prior to running the asemble line, we can view the contents of our TDS instance
"test". We like to use Softerra's LDAP Administrator. You may use whatever client you
like, or simply run an ldapsearch from the command line. We would have done exactly that
however, for demonstartion purposes this works a little better.
|
|
|
|
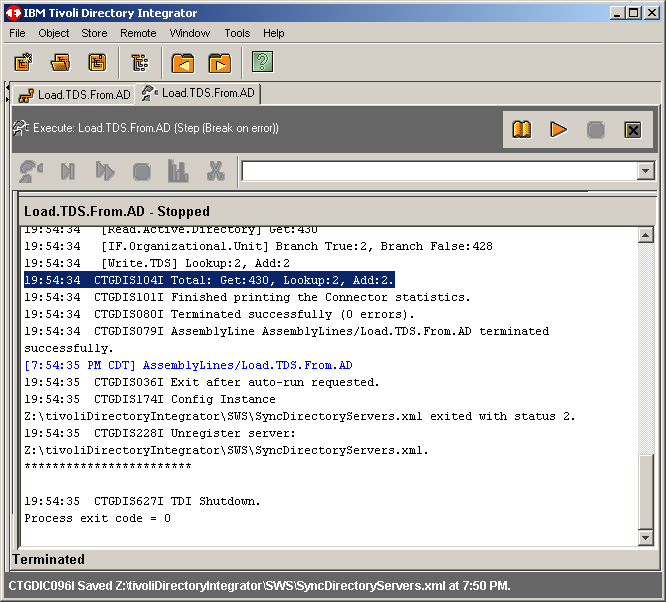
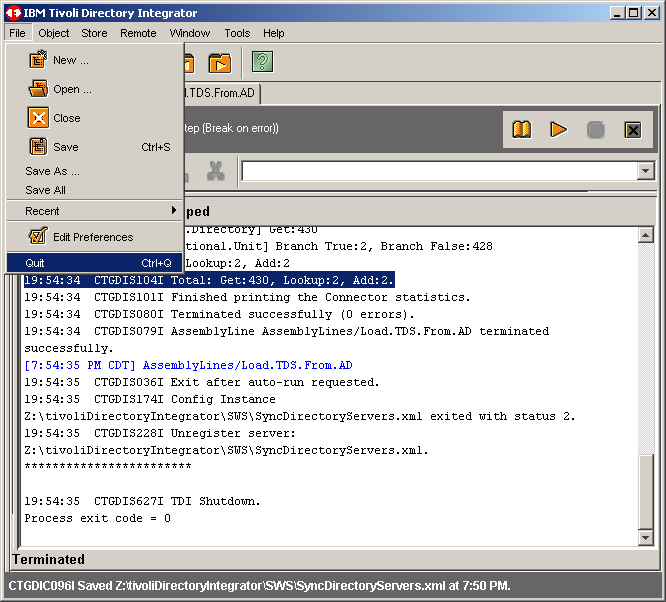
Once the assembly line has run to completion, you will see something like the following
screen. Notice that we have added a mere 2 objects to TDS. This is because our Active Directory
is as small as possible, as we recently created it and did not populate it at all. This is good
for our purposes.
|
|
|
|
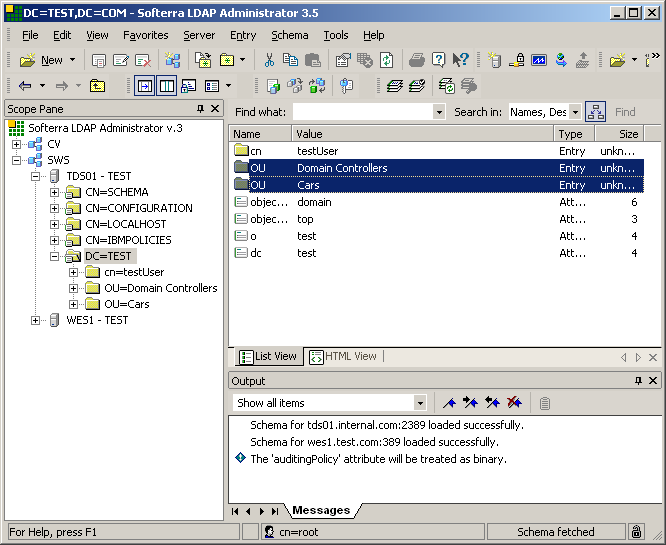
Refreshing our LDAP Administrator screen, we see the addition of the two objects that
were added from AD via TDI above.
|
|
|
|
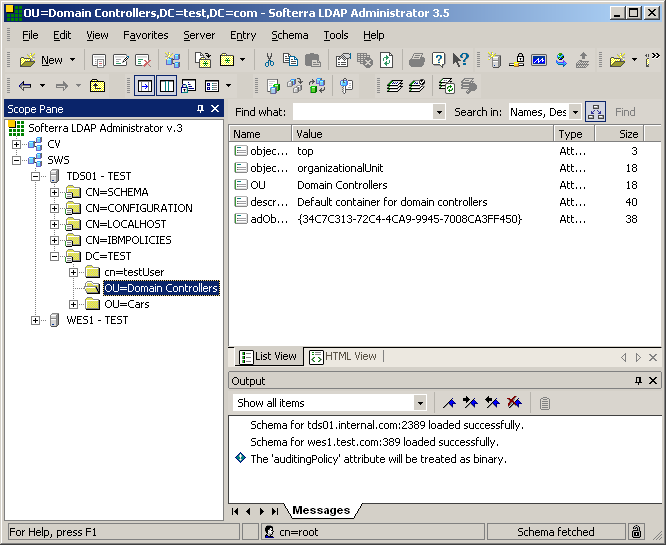
Drilling down into one of the objects also shows that the attribute adObjectGUIDStr was
also created. This attribute is very important and will serve as link criteria in subsequent
articles.
|
|
|
|
Time to wrap things up here. Quit the IDE as shown.
|
|
|
|
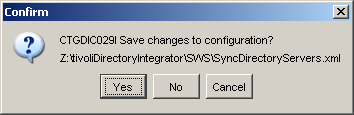
Click Yes to save the current configrtion if so prompted.
|
|
|
|
Conclusion
This concludes this first article of our series. We hope that you have learned a little
something more about Tivoli Directory Integrator as we have. As always, if you have something
to add or correct, please feel free to drop the author an email.
|
|
Printing This Article
If you have trouble printing this article, be sure to set your browser Page Properties correctly. Go
to File -> Page Setup and set your left and right margins to .125 inches.
|